Quickstart
This document provides a step-by-step guide to deploying and optimizing a cluster with CloudPilot AI. It covers cluster creation, connection to the CloudPilot AI console, installation of optimization components, and cluster rebalancing.
Deployment Options
CloudPilot AI offers two deployment methods:
Console-Based Deployment (This Guide)
Follow the step-by-step instructions below to deploy CloudPilot AI through the web console. This method is ideal for:
- Quick setup and testing
- Manual cluster management
- Learning CloudPilot AI features
Infrastructure as Code with Terraform
For production environments and infrastructure automation, use the CloudPilot AI Terraform Provider. This method provides:
- Automated deployment and configuration
- Version-controlled infrastructure
- Repeatable and consistent deployments
- Integration with existing Terraform workflows
Choose the deployment method that best fits your workflow. The following steps guide you through the console-based deployment.
Prerequisites
- A supported Kubernetes cluster: Amazon EKS, Alibaba Cloud ACK, Google Kubernetes Engine (GKE), or Azure Kubernetes Service (AKS).
- Administrative access to the cluster and to the corresponding cloud provider account.
kubectlinstalled and configured to talk to the cluster.- For EKS:
awscliandeksctl. - For ACK: the
aliyunCLI. - For GKE:
gcloud,helm,jq, andcurl, plus a cluster with Workload Identity enabled before Phase 2. - For AKS:
az,helm,jq, andcurl, plus a cluster with OIDC issuer and Microsoft Entra Workload ID enabled before Phase 2. - Access to the CloudPilot AI console .
Step 1: Create or Select a Supported Cluster
CloudPilot AI currently supports EKS (AWS), ACK (Alibaba Cloud), GKE (Google Cloud), and AKS (Azure) clusters. If you already have a compatible cluster, skip this step.
- To quickly create an EKS cluster, refer to the Demonstration Cluster for CloudPilot AI .
- To quickly create an ACK cluster, refer to the ACK examples used throughout the Alibaba Cloud provider docs.
- For GKE, use your standard GKE provisioning workflow first, then continue with GKE Getting Started.
- For AKS, use your standard AKS provisioning workflow first.
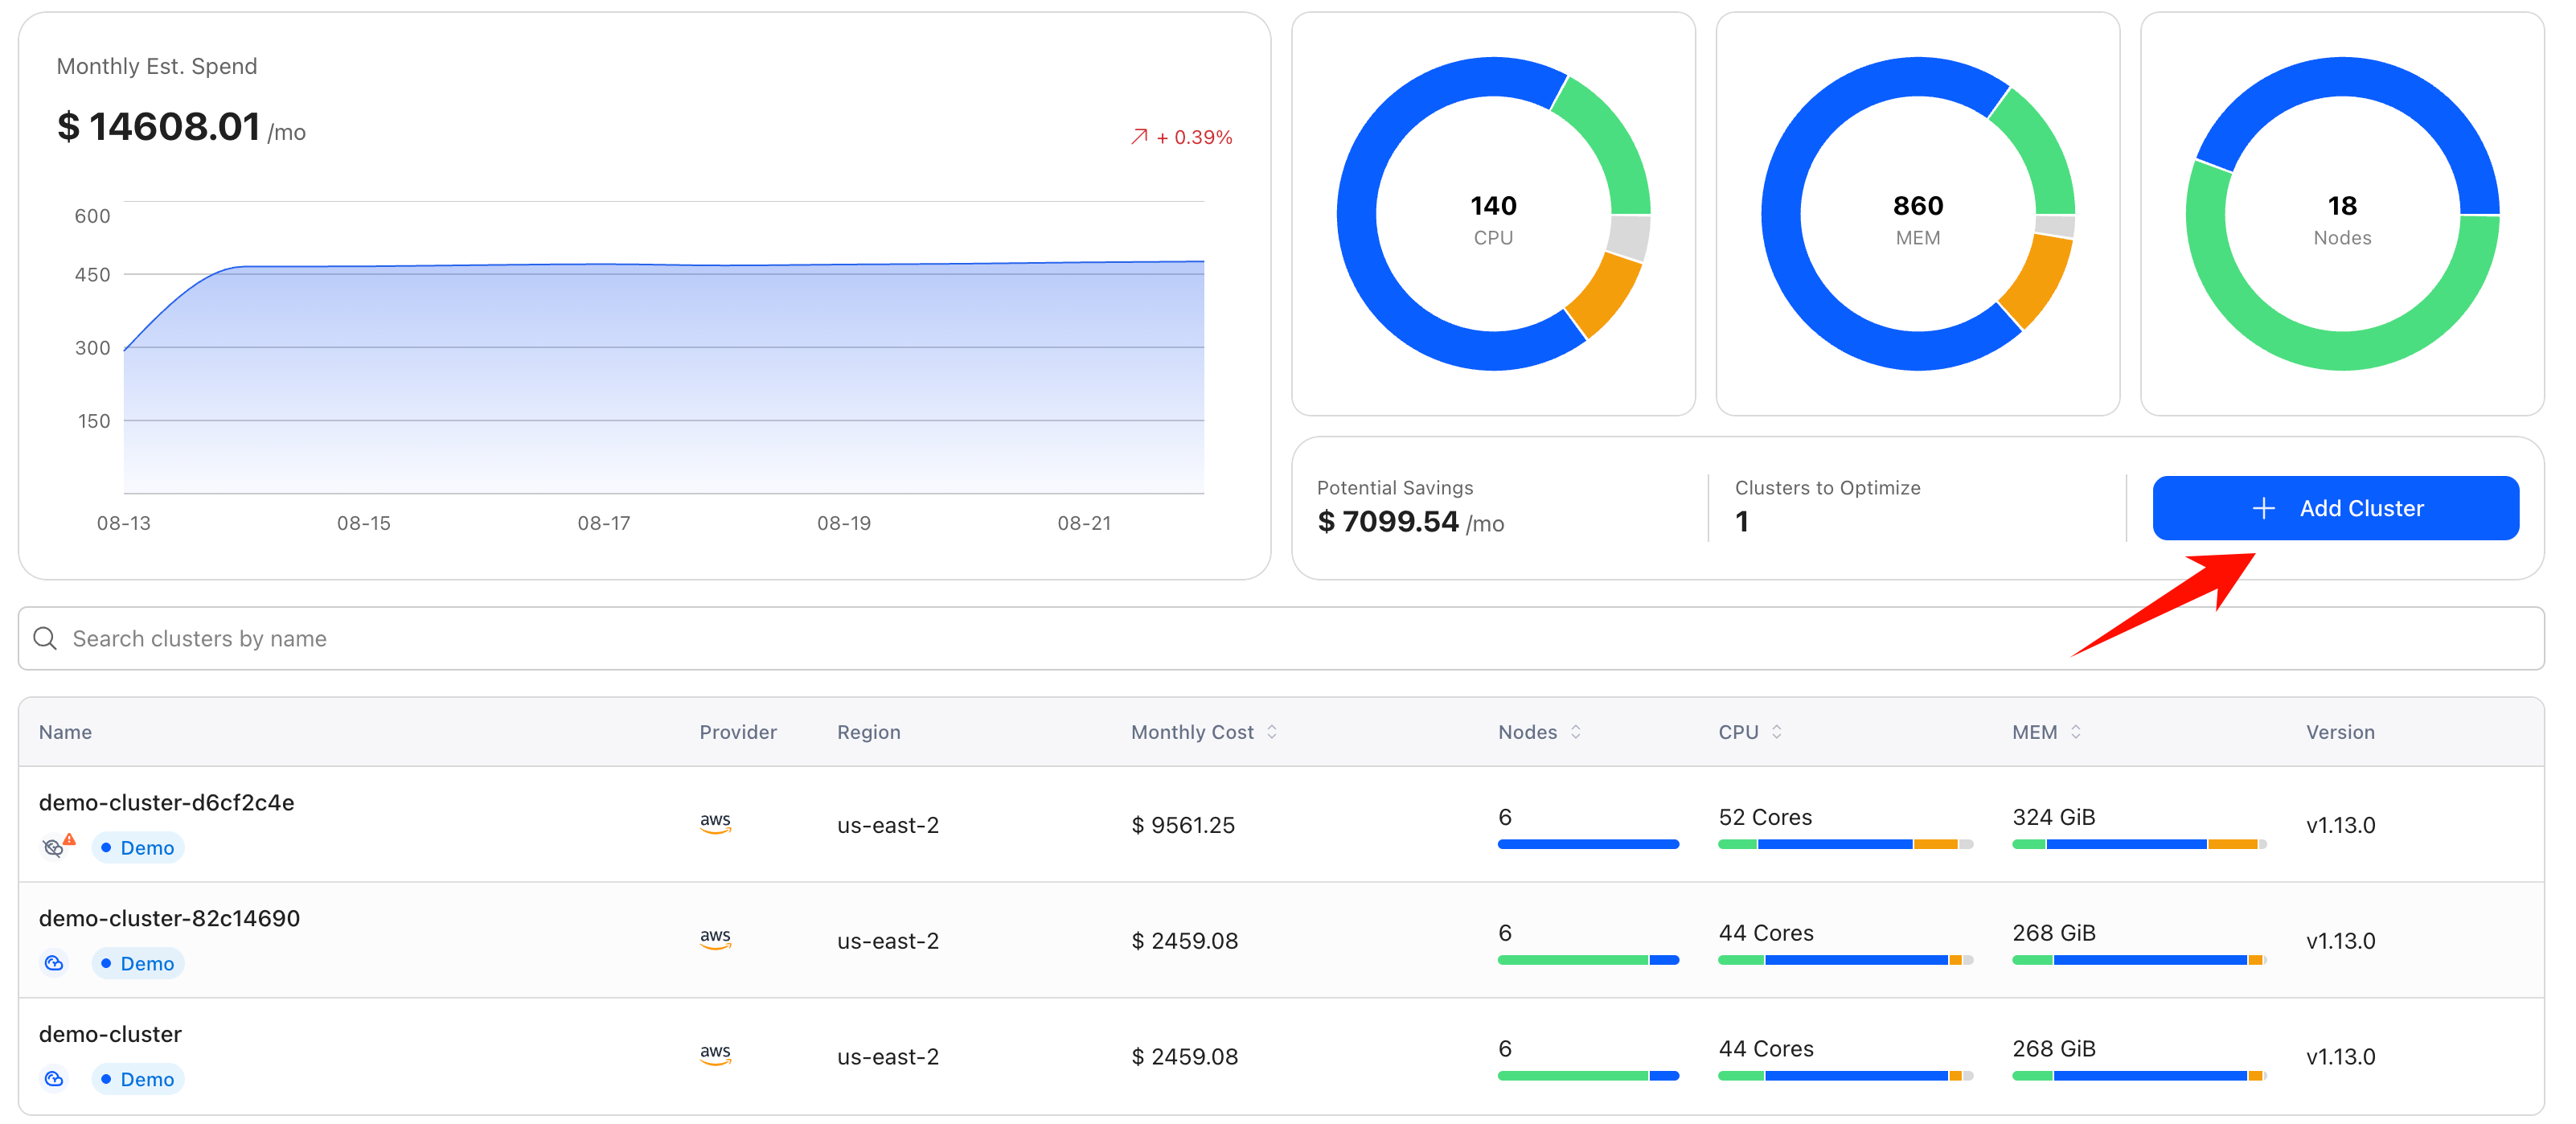
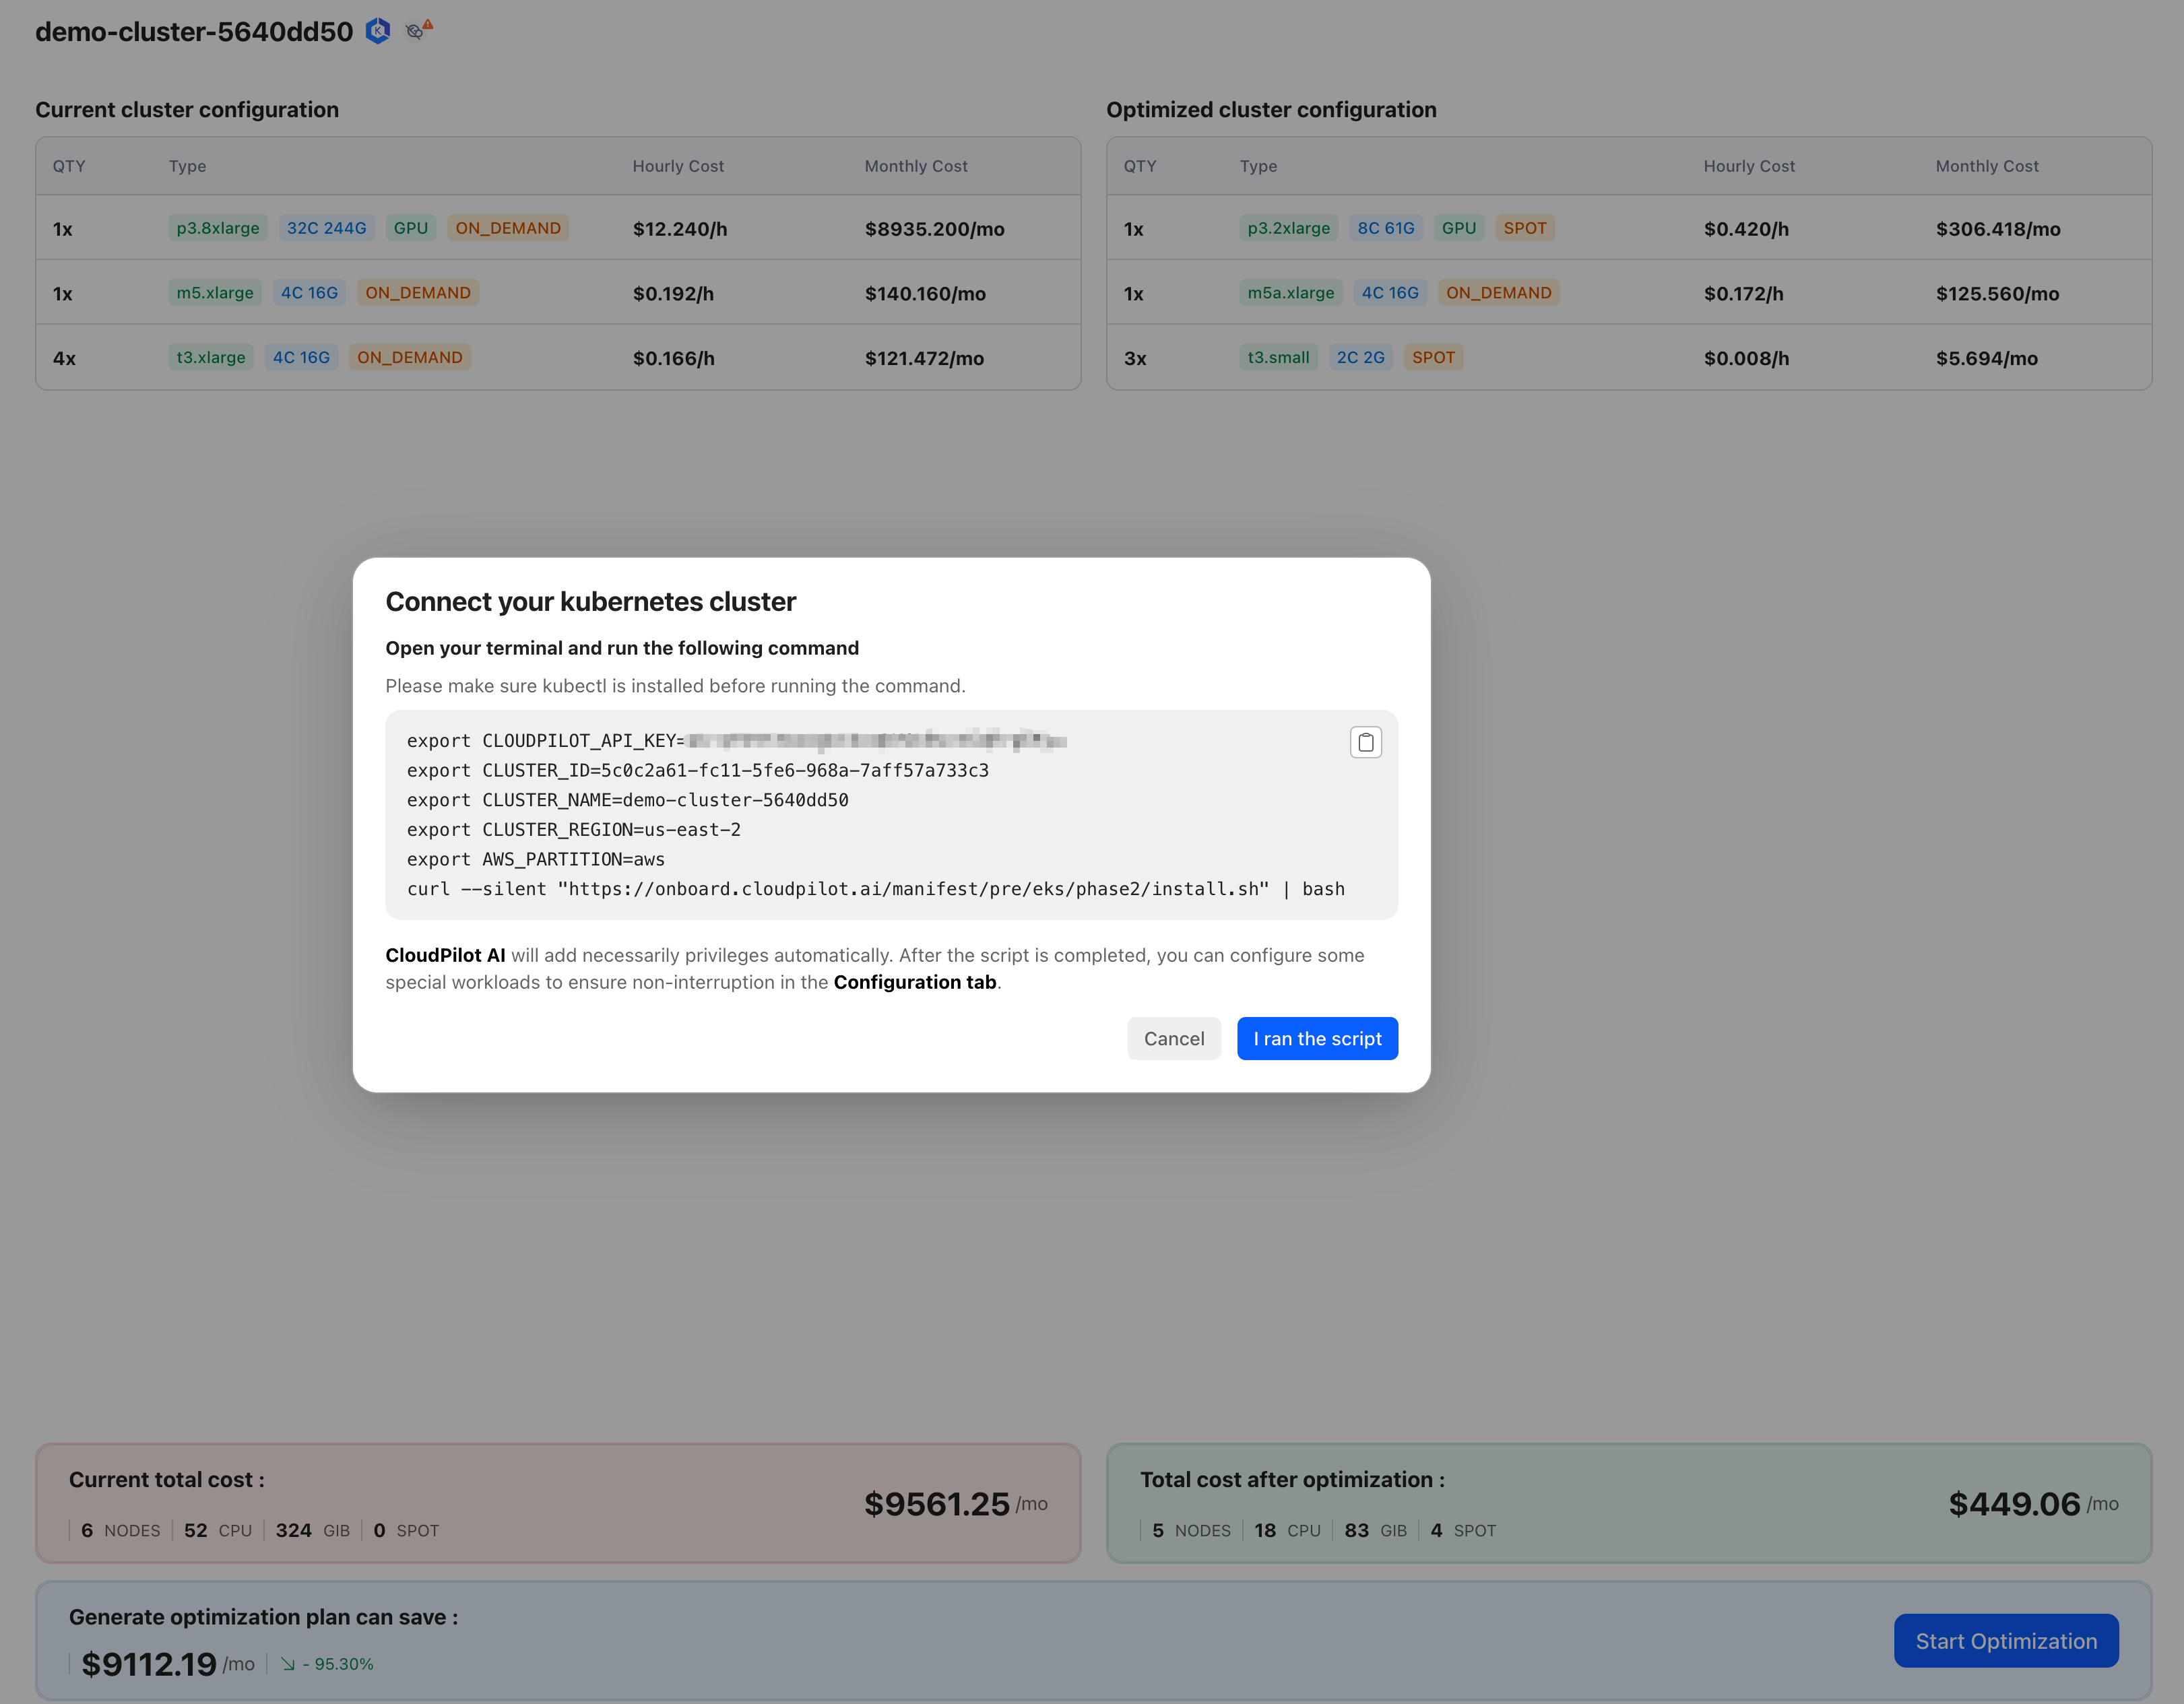
Step 2: Connect Your Cluster to CloudPilot AI
After logging into the CloudPilot AI console , perform the following:
- Click Add Cluster.
- Copy and execute the provided shell command in your terminal.
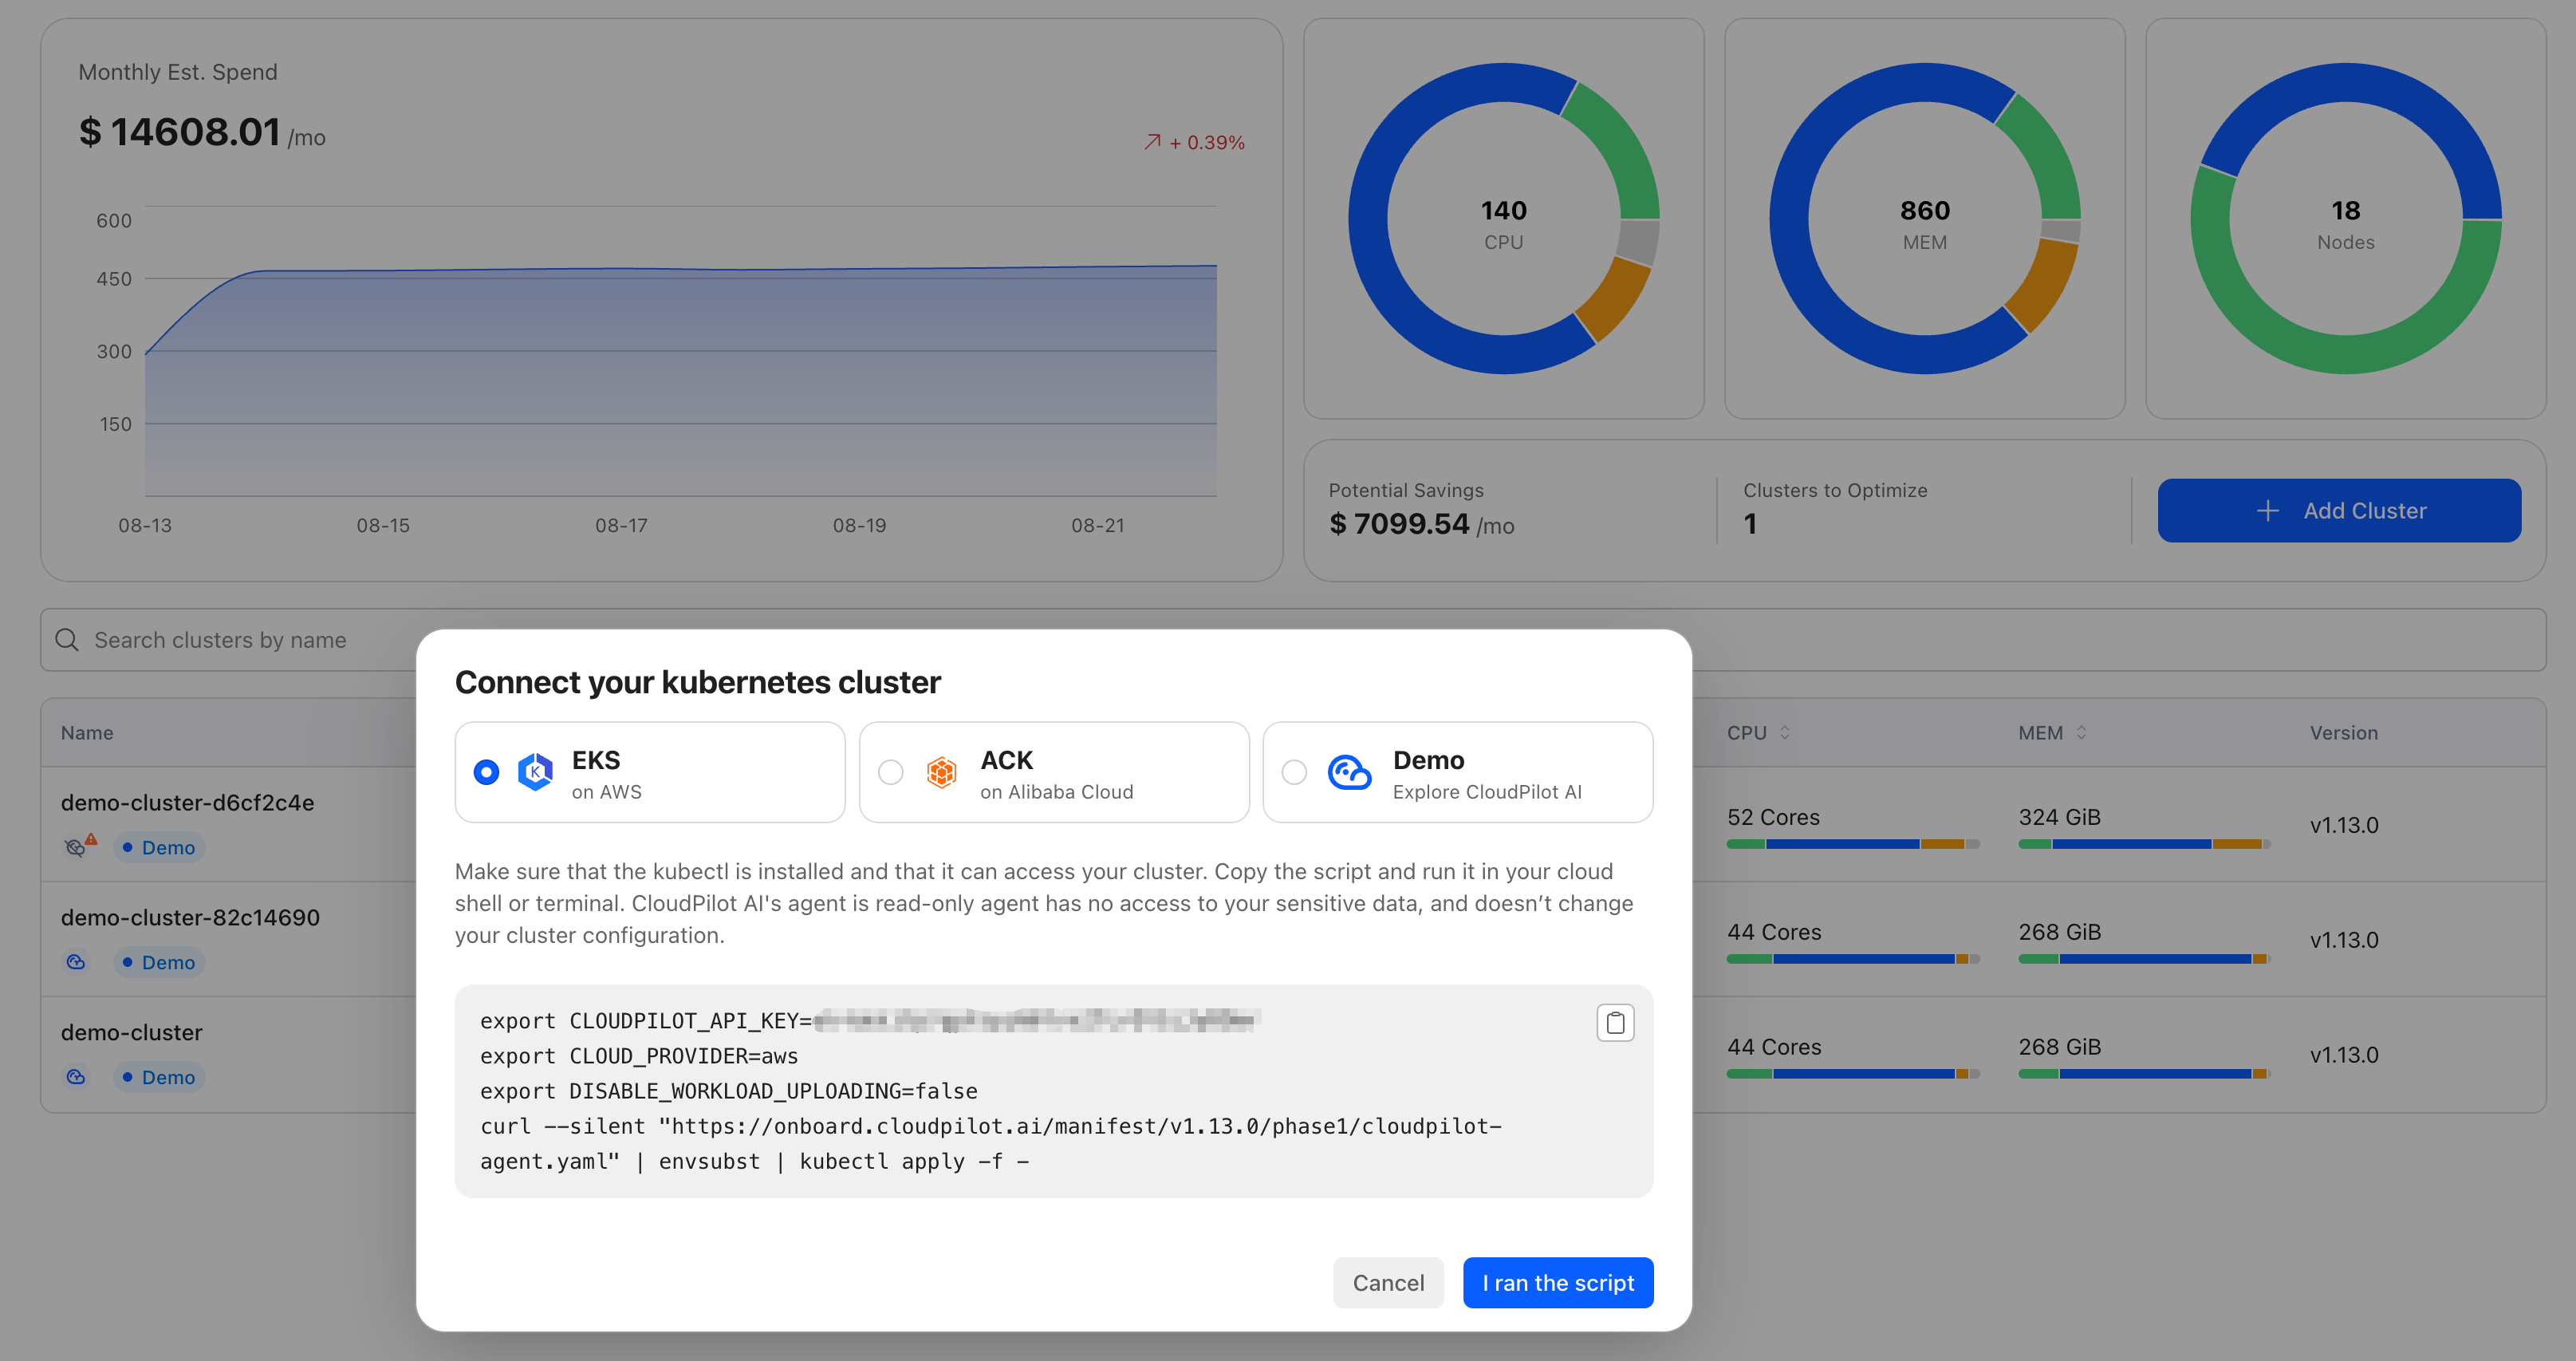
After executing the script:
- Click I ran the script.
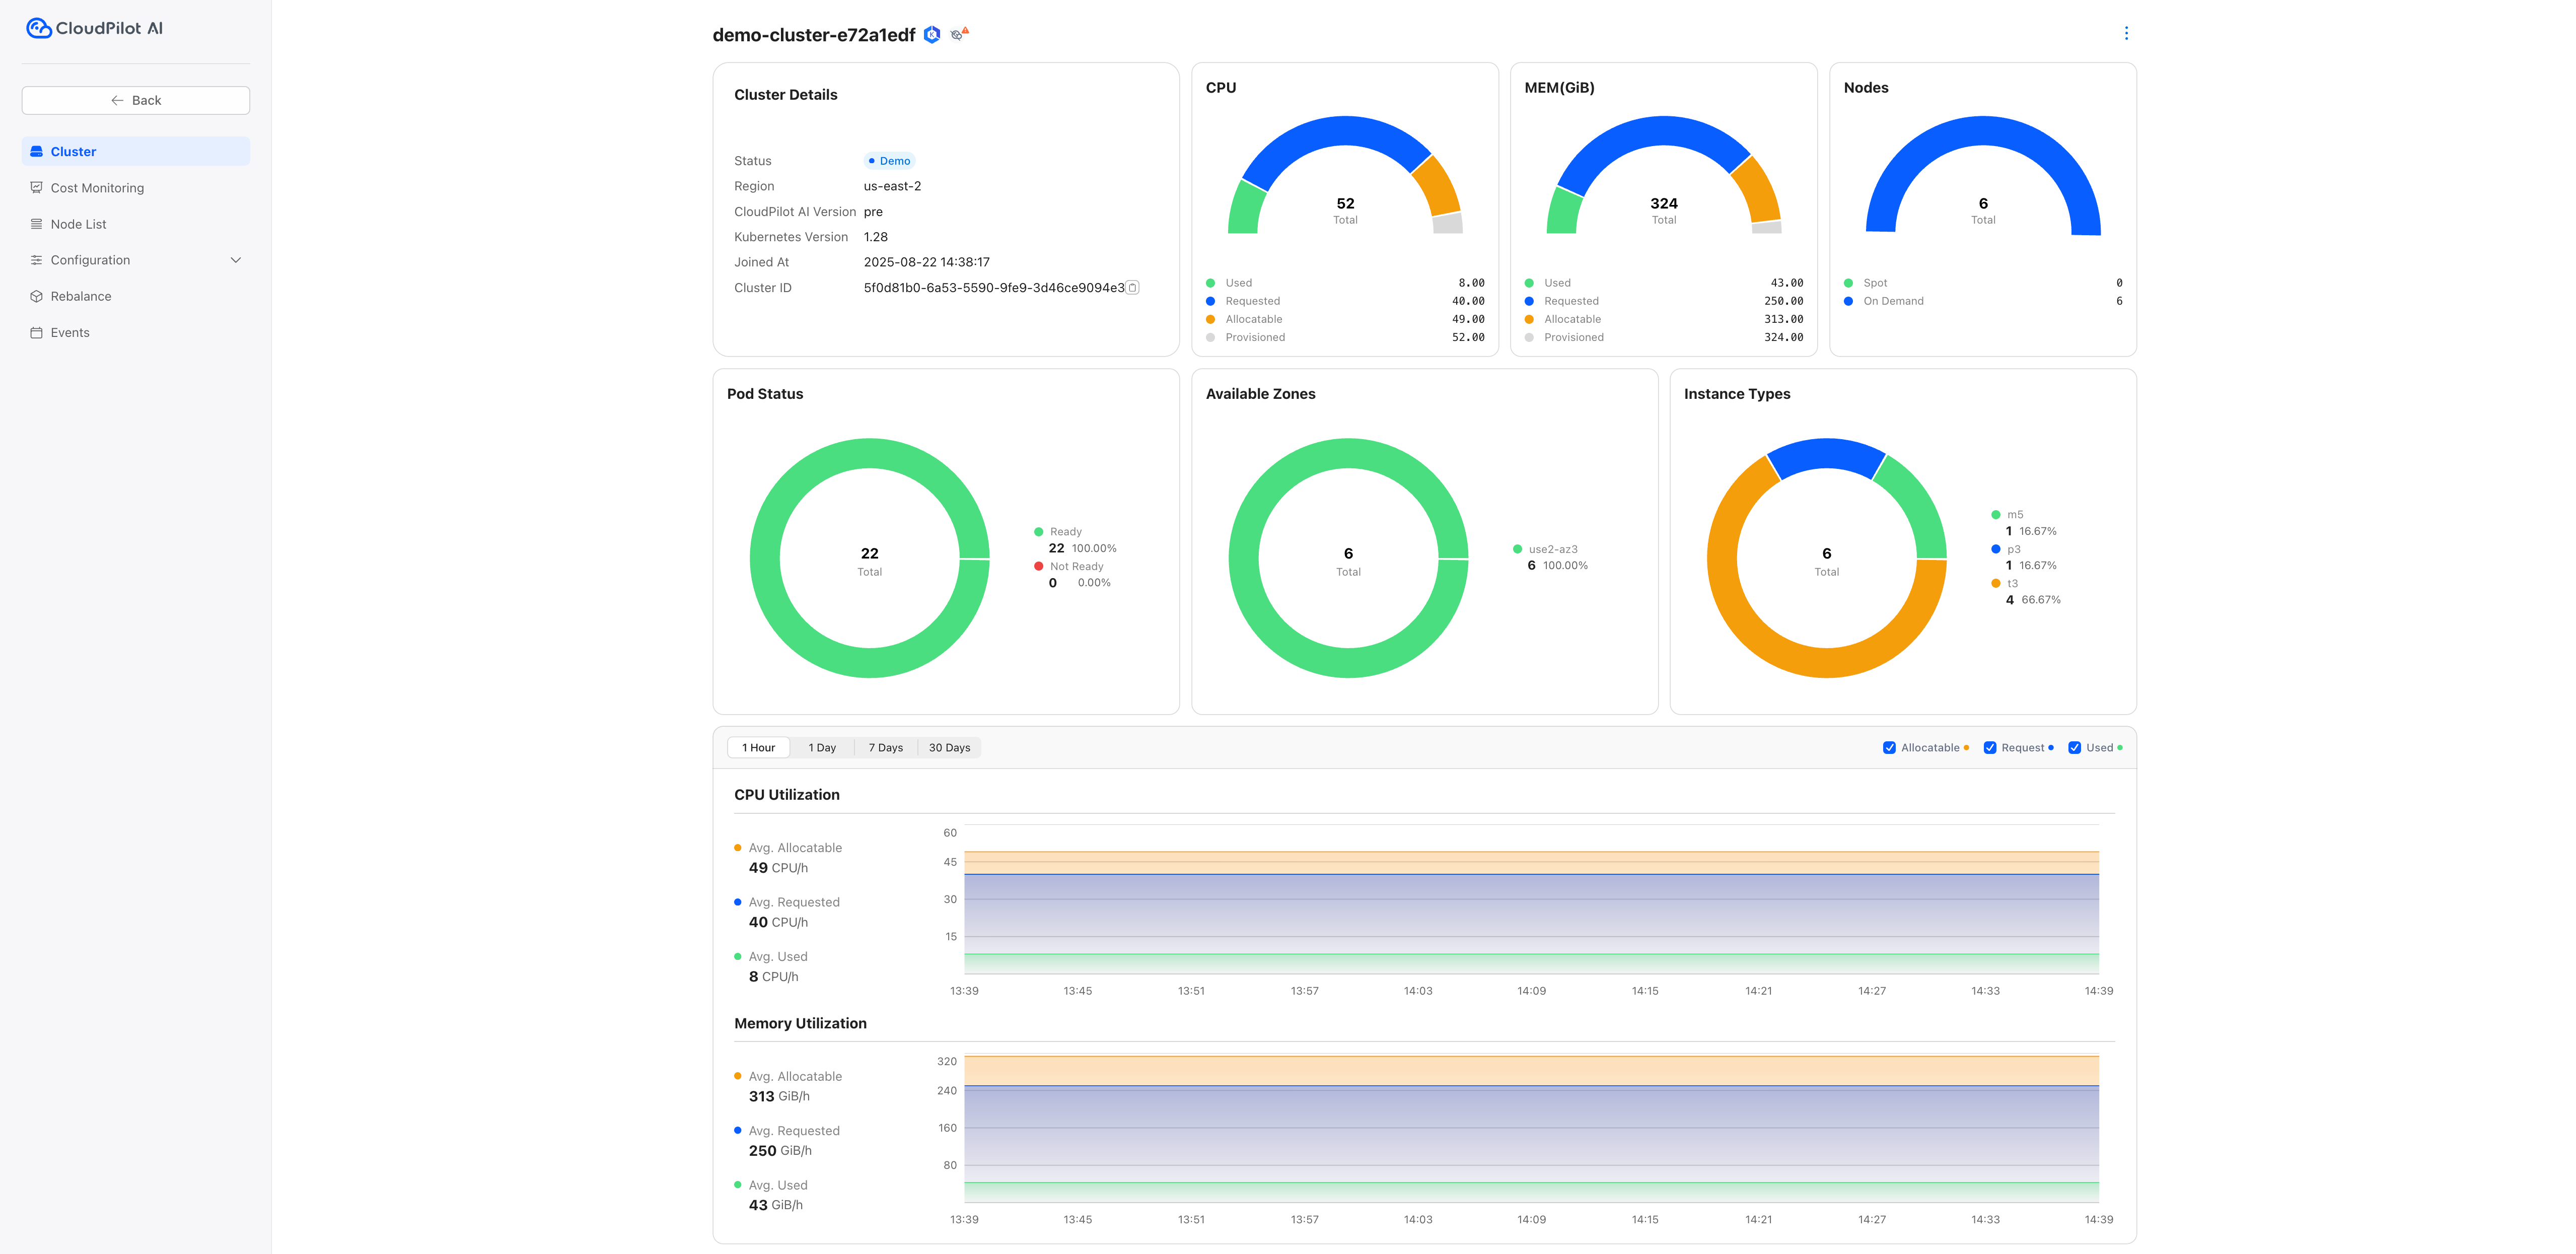
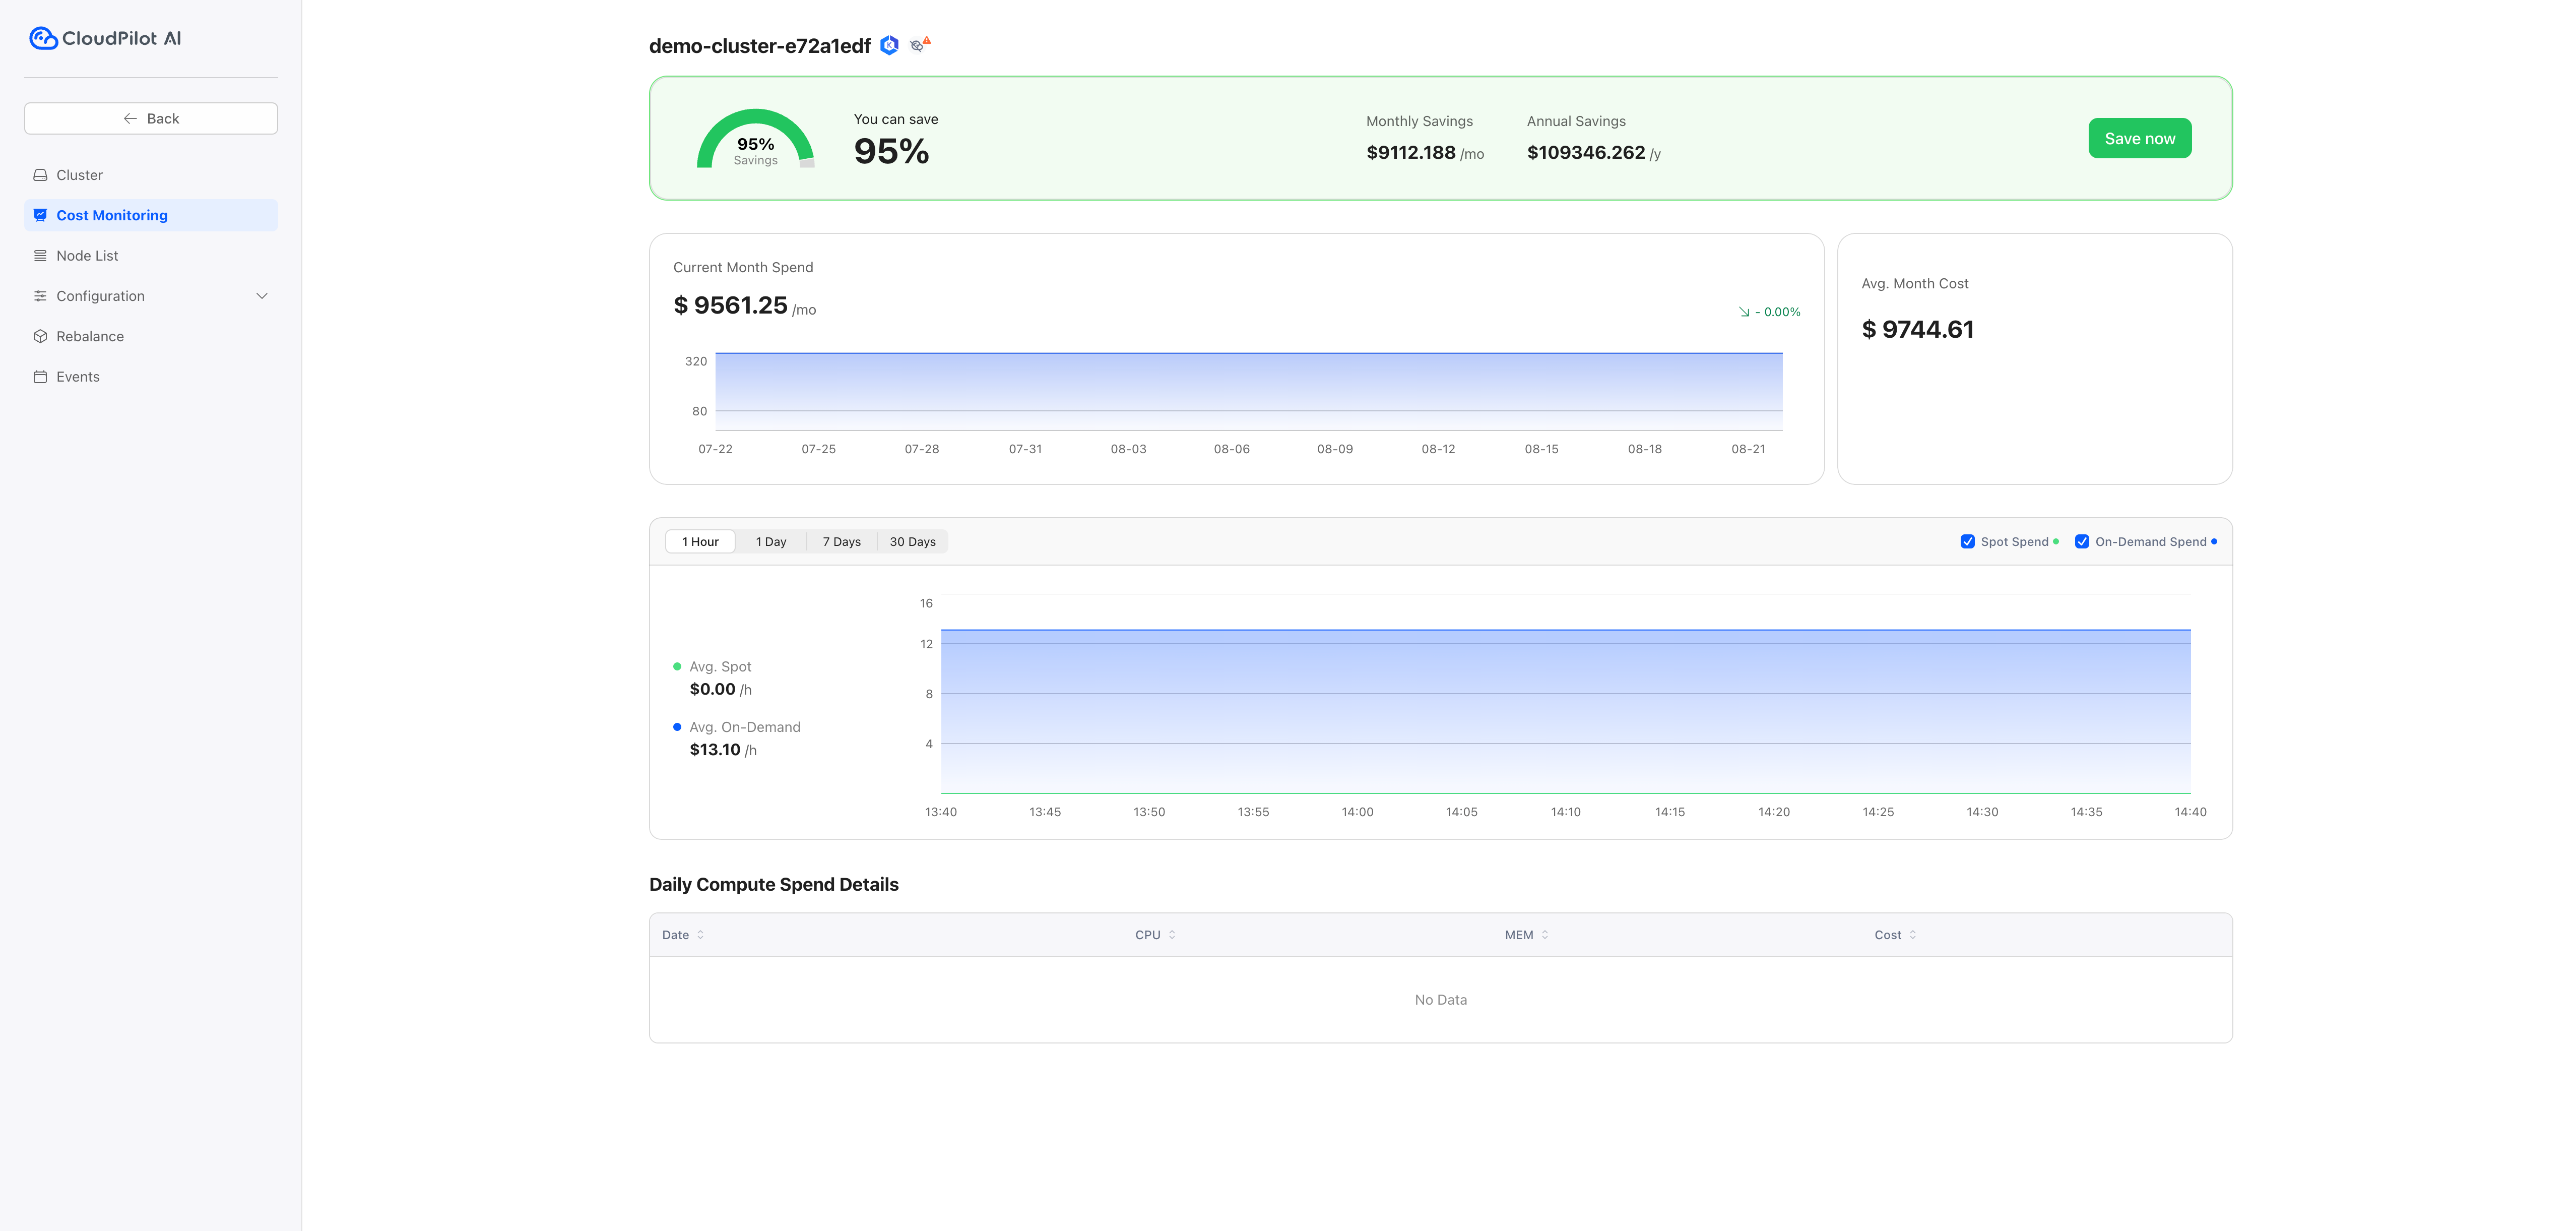
- Click the selected cluster, navigate to the Cluster and Cost Monitoring tab, and view the potential savings.
GKE note: the Add Cluster script uses
CLOUD_PROVIDER=gcpand relies on GKE metadata during Phase 1, so you do not need to manually injectCLUSTER_NAMEinto the Phase 1 script.
AKS note: the Add Cluster script uses
CLOUD_PROVIDER=azure, so make sure your current kubeconfig context points at the intended AKS cluster before you run it.
Step 3: Install CloudPilot AI Optimization Components
Once your cluster is connected, proceed to install the optimization components:
- Run the provided shell script in your environment.
- After successful execution, click I ran the script.
You will be redirected to the Rebalance page.
GKE note: the Phase 2 script expects
GCP_PROJECT_ID,CLUSTER_ID,CLUSTER_NAME,CLUSTER_REGION, and the exactCLUSTER_LOCATION, plus a cluster with Workload Identity enabled. For the provider-specific walkthrough, see GKE Getting Started.
AKS note: the AKS Phase 2 flow requires the Azure CLI plus a cluster with OIDC issuer and Microsoft Entra Workload ID enabled. The installer auto-detects the AKS cluster name, subscription, and resource groups from the connected cluster when possible.
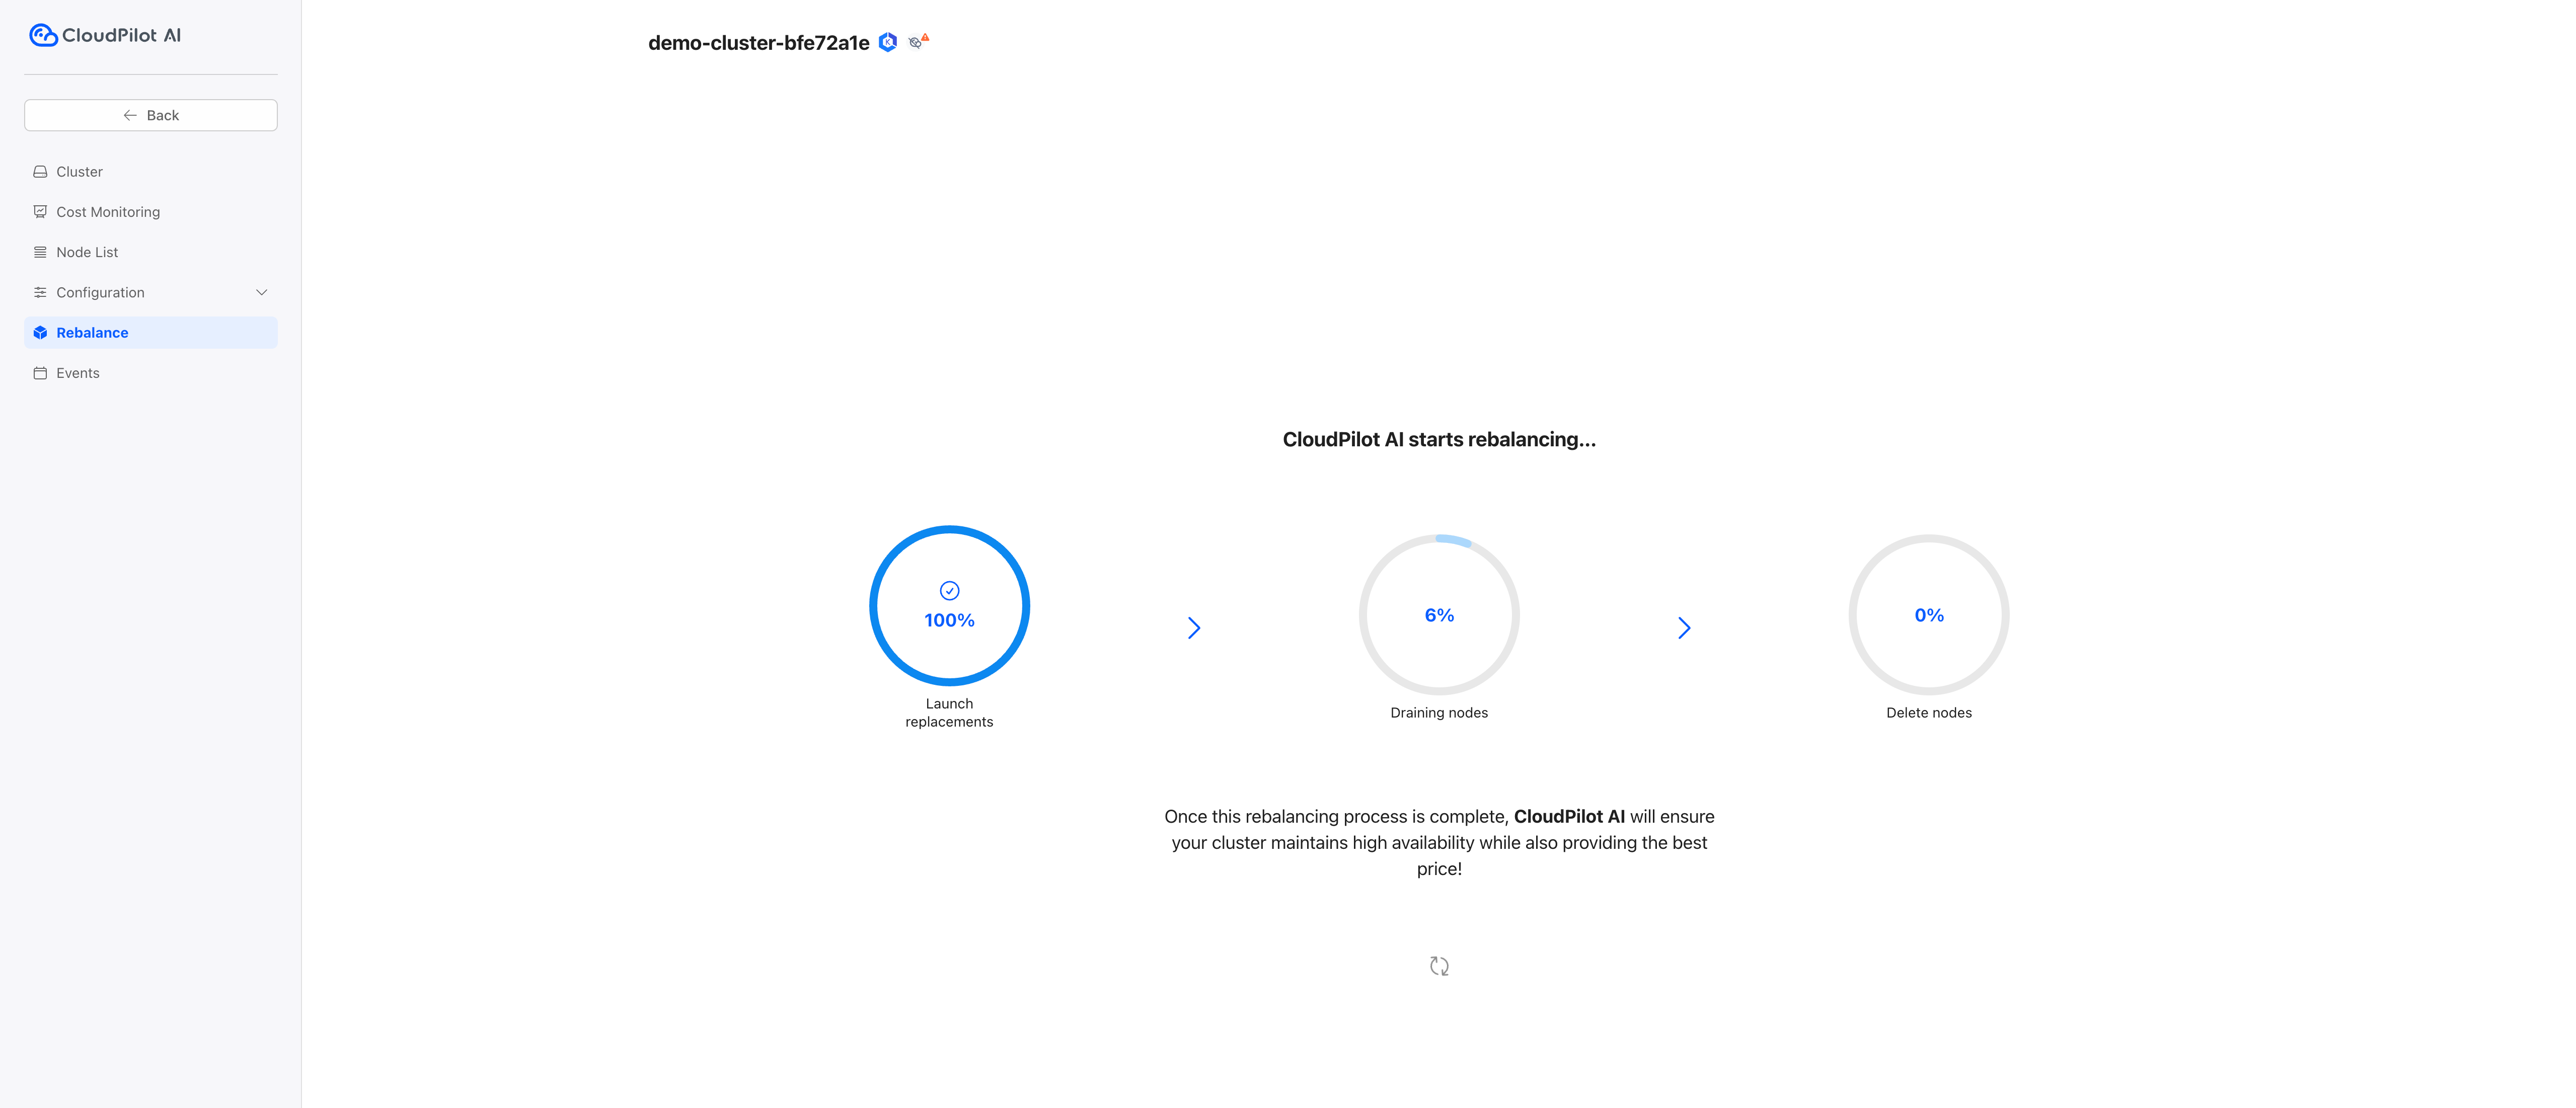
Step 4: Rebalance Your Cluster
To optimize your cluster, initiate the rebalance process. This consists of three steps:
- Launch new replacement nodes.
- Drain workloads from old nodes to the new ones.
- Terminate the old nodes safely after draining.
This ensures zero-downtime workload migration while optimizing resource usage.
Once completed, your cluster will be under CloudPilot AI management. It will automatically scale out during workload surges and scale in during low usage, always selecting the most suitable node types for your workloads.