Uninstalling CloudPilot AI
This guide outlines the safe and smooth removal of CloudPilot AI components from your cluster. The steps detailed here are provider-agnostic and applicable to any Kubernetes cluster.
Prerequisites
Before starting the uninstallation, ensure:
- You have administrative access to the Kubernetes cluster.
- A compatible node group or node pool is prepared and ready to accommodate your workloads.
- PodDisruptionBudgets (PDB) are correctly configured if your cluster has strict stability requirements.
- For GKE, export the exact
CLUSTER_LOCATIONand keep Workload Identity enabled until the final uninstall step has completed. - For AKS, keep the
azCLI authenticated against the correct subscription and leave OIDC issuer and Microsoft Entra Workload ID enabled until the final uninstall step has completed.
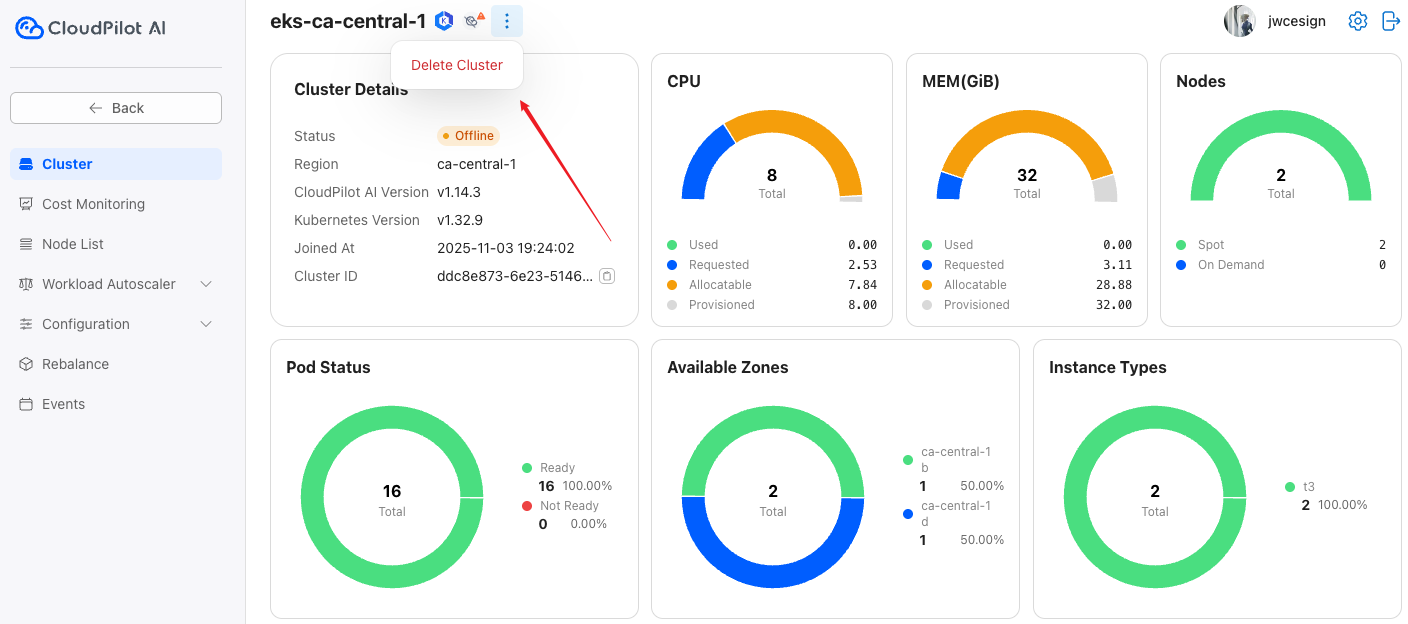
Step 1: Remove Cluster from CloudPilot AI Management
On the cluster page, click option for the cluster you intend to detach from CloudPilot AI. Verify carefully before proceeding to avoid unintended cluster removal.
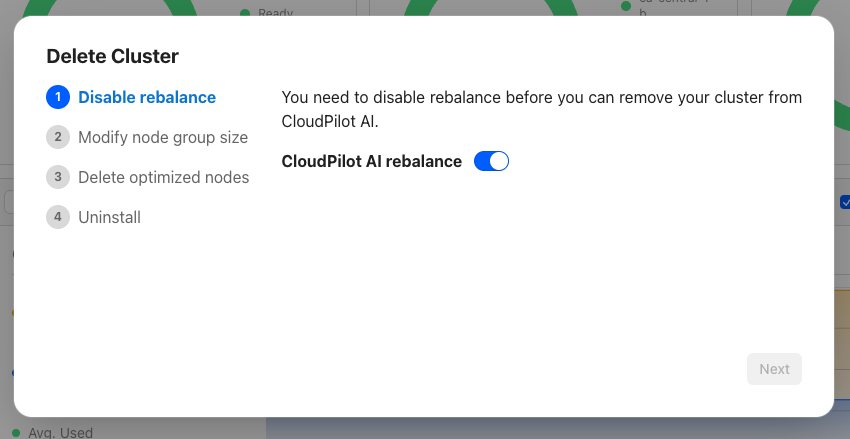
Step 2: Disable Rebalancing
As a preliminary step, disable the Rebalance feature to prevent potential rollback failures.
Disabling Rebalance will stop CloudPilot AI from provisioning new nodes and managing Spot interruptions. In the event of Spot interruptions, manual intervention will be required to mitigate unexpected behavior.
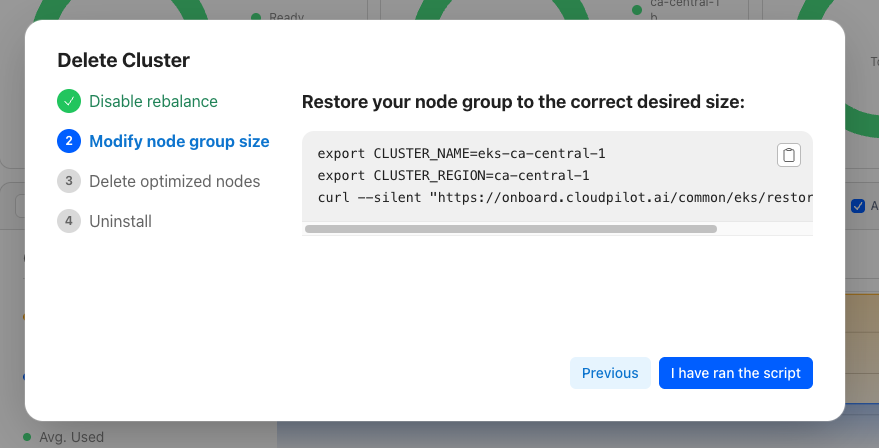
Step 3: Restore Original Node Groups or Pools
Restore the original configurations of your node groups or pools to ensure workloads can migrate back seamlessly.
If misconfiguration during this step impedes pod migration, you can safely repeat this step independently of CloudPilot AI functionalities.
Step 4: Evict Pods from CloudPilot AI Managed Nodes
Evict all pods currently running on nodes managed by CloudPilot AI. This step migrates pods back to your original node groups or pools. Be cautious as pod disruptions will occur.
If your cluster requires high stability, ensure appropriate PodDisruptionBudgets (PDB) are set prior to execution to maintain cluster stability during pod eviction.
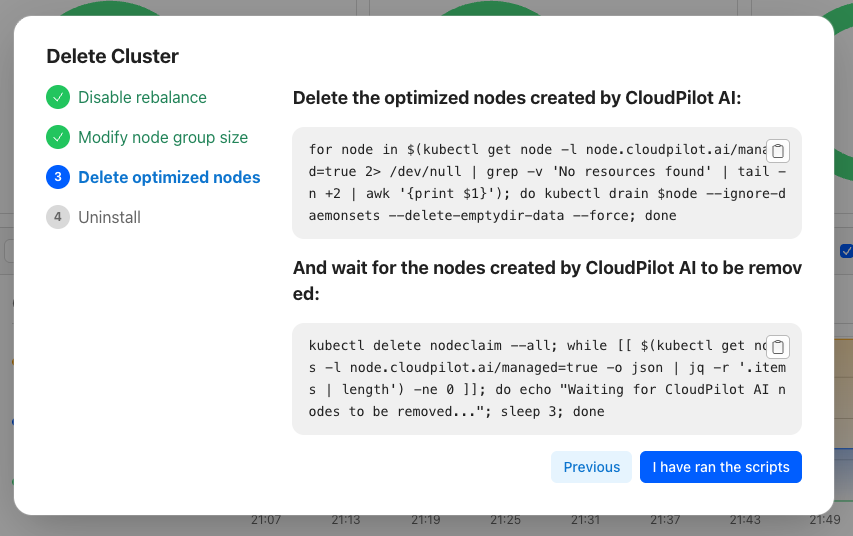
Once eviction is complete, nodes previously managed by CloudPilot AI will be removed from the cluster.
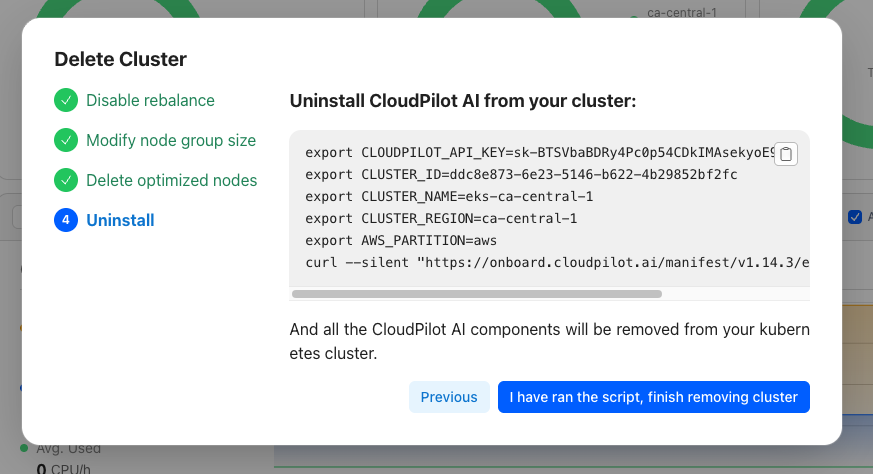
Step 5: Remove CloudPilot AI Components
After verifying all nodes have been successfully evicted and the cluster remains stable, proceed to remove all CloudPilot AI related components.
On GKE, the final uninstall script also removes CloudPilot-managed GKE NodeClaims, NodePools, and GCENodeClasses, then cleans up the CloudPilot Workload Identity binding and custom IAM role when they are no longer in use. If you supplied a custom controller GSA, the script leaves that GSA in place and only removes the CloudPilot-specific bindings.
On AKS, the final uninstall script also removes CloudPilot-managed AKS NodePools / AKSNodeClasses, deletes the CloudPilot federated credential, and cleans up the Azure role assignments created for the Azure optimizer.
More
Troubleshooting Improper Uninstallation
During the uninstallation process, you may encounter the following issues if the correct steps are not followed:
- Pod creation failures
- Nodes created by CloudPilot AI remain orphaned (nodes cannot be created or deleted)
This typically occurs when the cloudpilot namespace is deleted directly without following the proper uninstallation procedure.
To resolve this issue:
-
Remove the orphaned webhook configuration:
kubectl delete mutatingwebhookconfigurations.admissionregistration.k8s.io cloudpilot-webhook -
Reinstall the CloudPilot agent using the current script from the Add Cluster button. Re-run the current Add Cluster command for the same provider from CloudPilot AI console instead of reusing an older hardcoded manifest version.
-
Reinstall CloudPilot fully using the current Start Saving script. Re-run the current Start Saving command for the same provider from CloudPilot AI console so the phase2 install uses the current provider-specific manifest path.
-
Re-run the normal uninstallation process.
Uninstall Fails Due to NodeClaim
During uninstallation, the script may fail with the following error:
Error: nodeclaim exist xxx, please return to the previous step and delete optimized nodes firstThis usually happens in test clusters with limited capacity — when CloudPilot components are evicted, they can’t be rescheduled, causing new nodeclaims to be created repeatedly.
To resolve this:
-
Expand cluster reserved resources
Go back to step 2 and increase the number of available nodes.
-
Reduce CloudPilot resource usage
Reduce the replica count and resource requests to ensure the cluster can handle the load during uninstallation.
# Reduce the number of replicas
# aws
kubectl -n cloudpilot scale deploy cloudpilot-aws-optimizer --replicas 1
# alibabacloud
kubectl -n cloudpilot scale deploy cloudpilot-alibabacloud-optimizer --replicas 1
# gcp
kubectl -n cloudpilot scale deploy cloudpilot-gcp-optimizer --replicas 1
# azure
kubectl -n cloudpilot scale deploy cloudpilot-azure-optimizer --replicas 1
# Reduce resource request/limit # aws kubectl -n cloudpilot patch deploy cloudpilot-aws-optimizer -p '{"spec":{"template":{"spec":{"containers":[{"name":"optimizer","resources":{"requests":{"cpu":"300m","memory":"300Mi"},"limits":{"cpu":"500m","memory":"500Mi"}}}]}}}}' # alibabacloud kubectl -n cloudpilot patch deploy cloudpilot-alibabacloud-optimizer -p '{"spec":{"template":{"spec":{"containers":[{"name":"optimizer","resources":{"requests":{"cpu":"300m","memory":"300Mi"},"limits":{"cpu":"500m","memory":"500Mi"}}}]}}}}' # gcp kubectl -n cloudpilot patch deploy cloudpilot-gcp-optimizer -p '{"spec":{"template":{"spec":{"containers":[{"name":"optimizer","resources":{"requests":{"cpu":"300m","memory":"300Mi"},"limits":{"cpu":"500m","memory":"500Mi"}}}]}}}}' # azure kubectl -n cloudpilot patch deploy cloudpilot-azure-optimizer -p '{"spec":{"template":{"spec":{"containers":[{"name":"optimizer","resources":{"requests":{"cpu":"300m","memory":"300Mi"},"limits":{"cpu":"500m","memory":"500Mi"}}}]}}}}'Then go back to step 3 and continue the uninstall process.
If issues persist, contact CloudPilot Technical Support immediately for assistance.