Getting Started with CloudPilot AI Universal
This document provides a step-by-step guide to deploying and optimizing a cluster with CloudPilot AI Universal. It covers cluster connection to the CloudPilot AI console, compute cost customization, and Workload Autoscaler installation.
Prerequisites
- A Kubernetes cluster (any distribution, including on-premises or other public cloud providers)
kubectlinstalled and configured to access your cluster- Access to the CloudPilot AI console
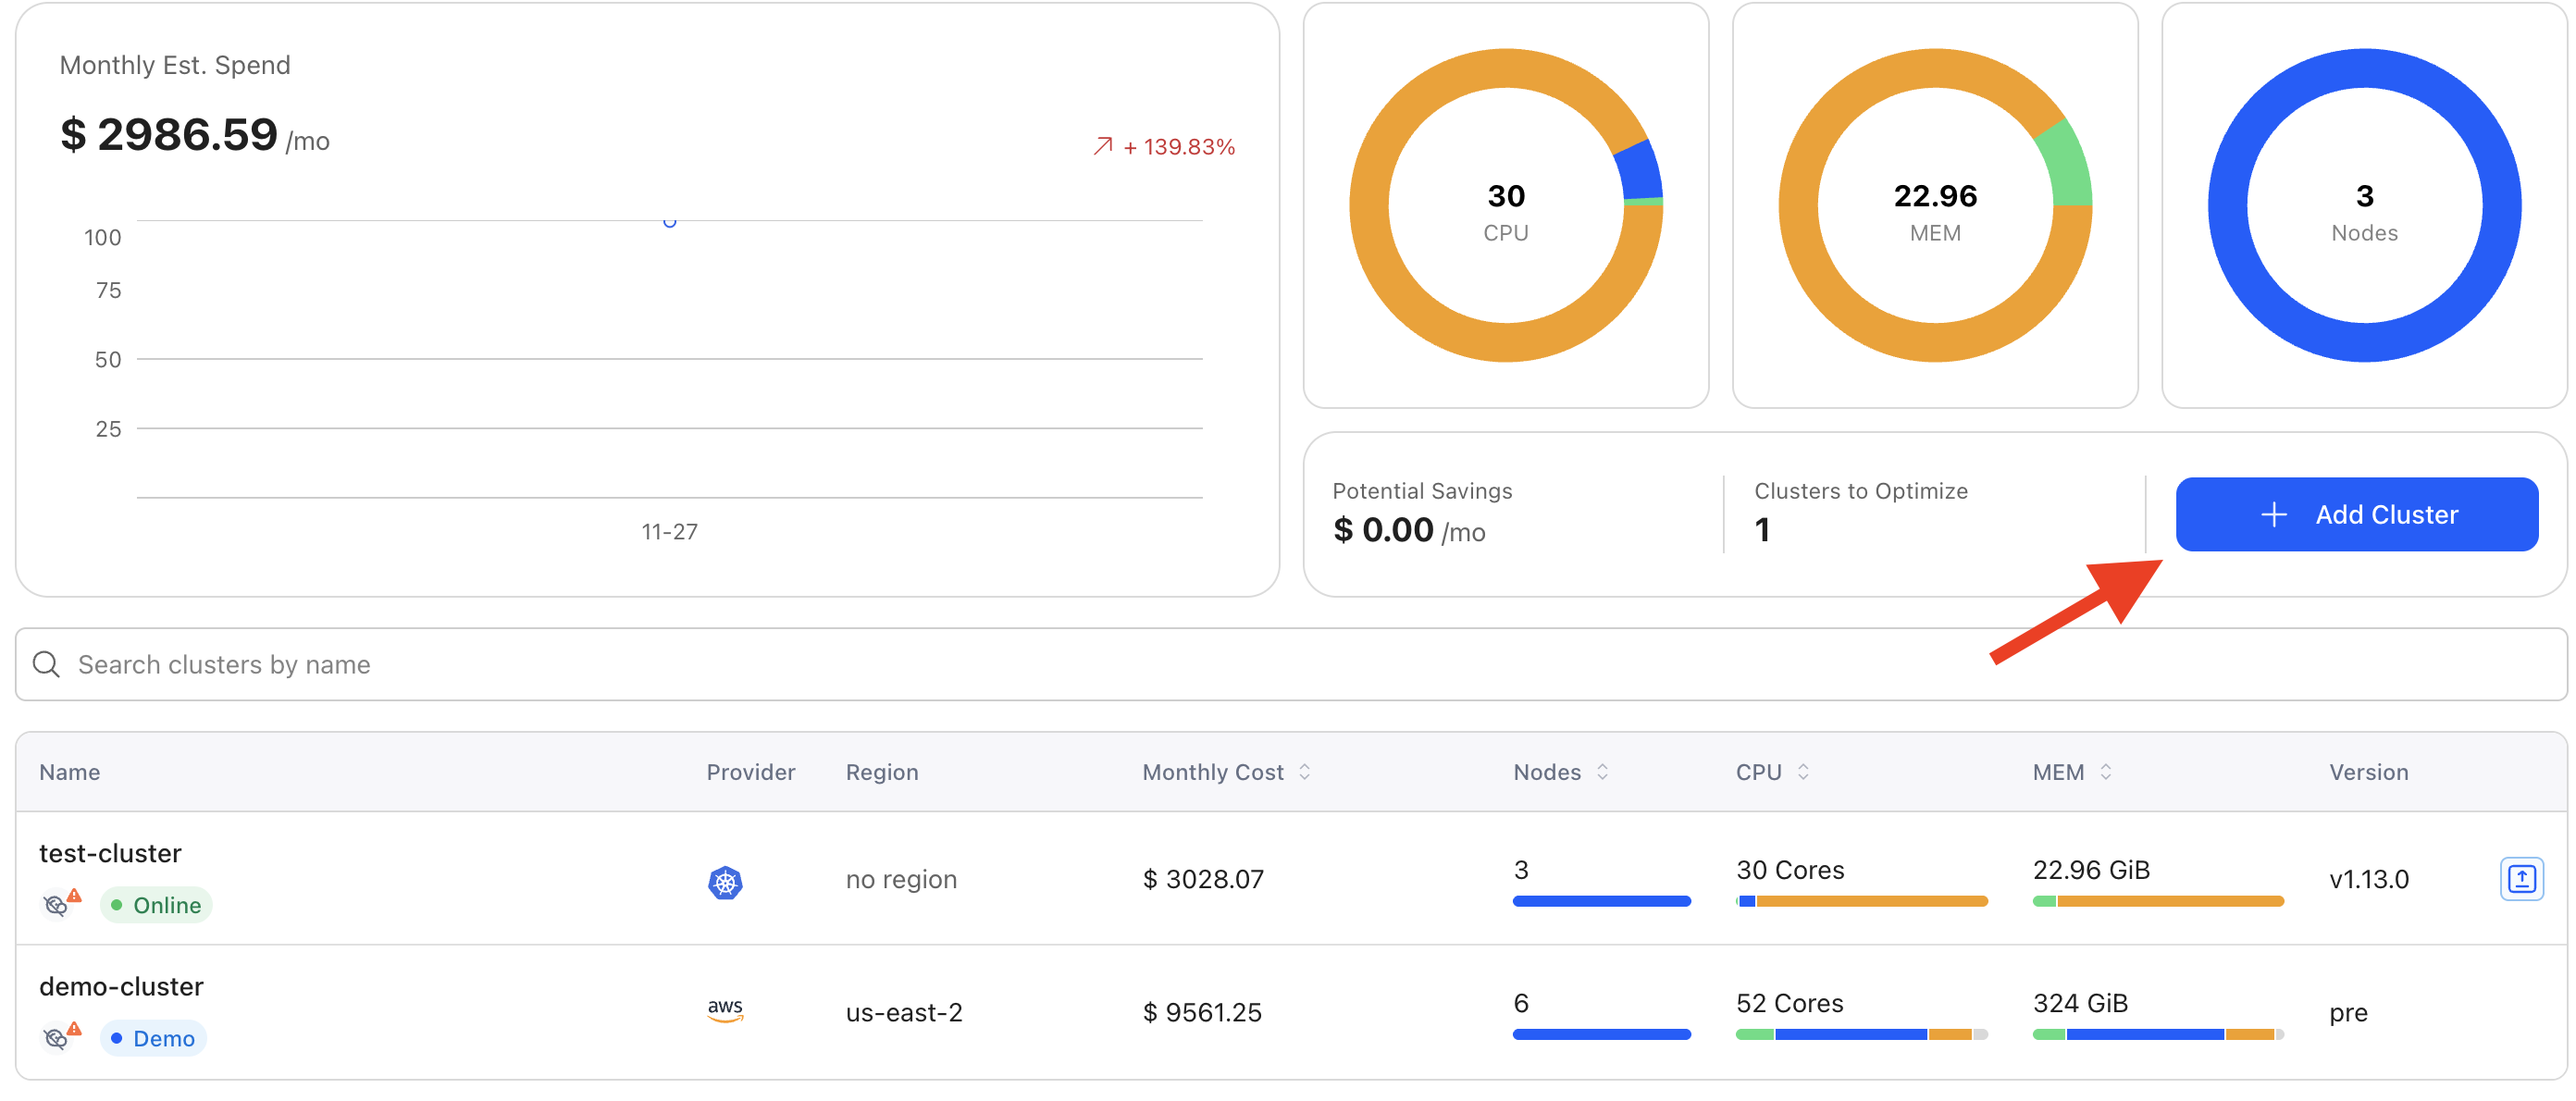
Step 1: Connect Your Cluster to CloudPilot AI
After logging into the CloudPilot AI console , perform the following:
- Click Add Cluster.
- Select Universal as the deployment mode.
- Enter the name of your cluster.
- Copy and execute the provided shell command in your terminal.
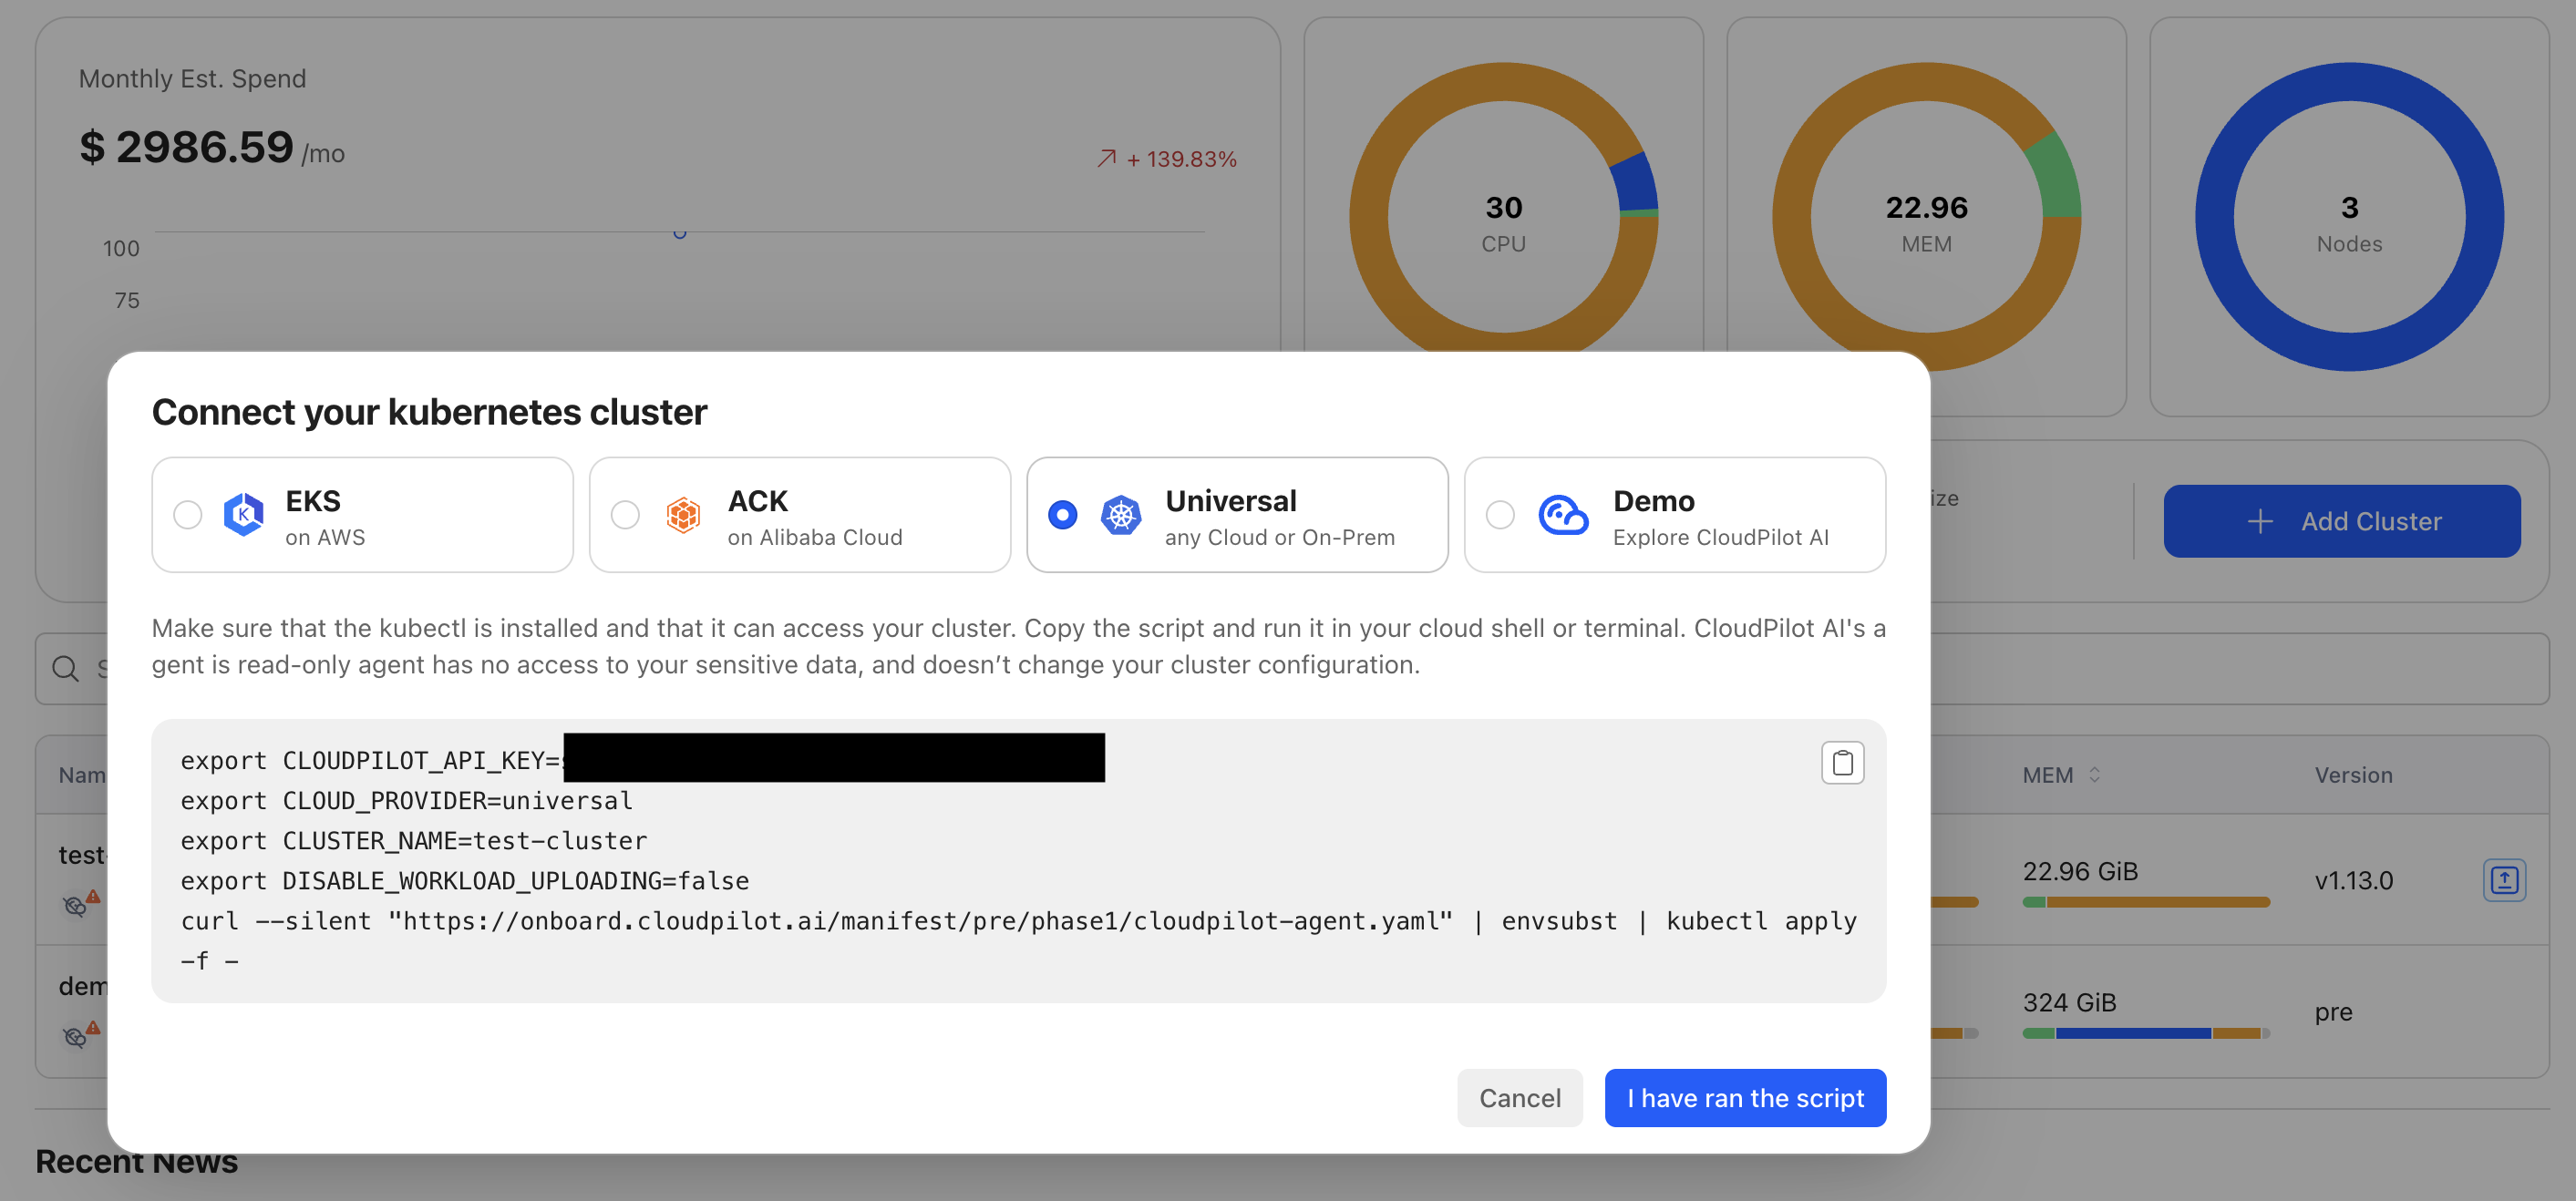
After executing the script:
- Click I ran the script.
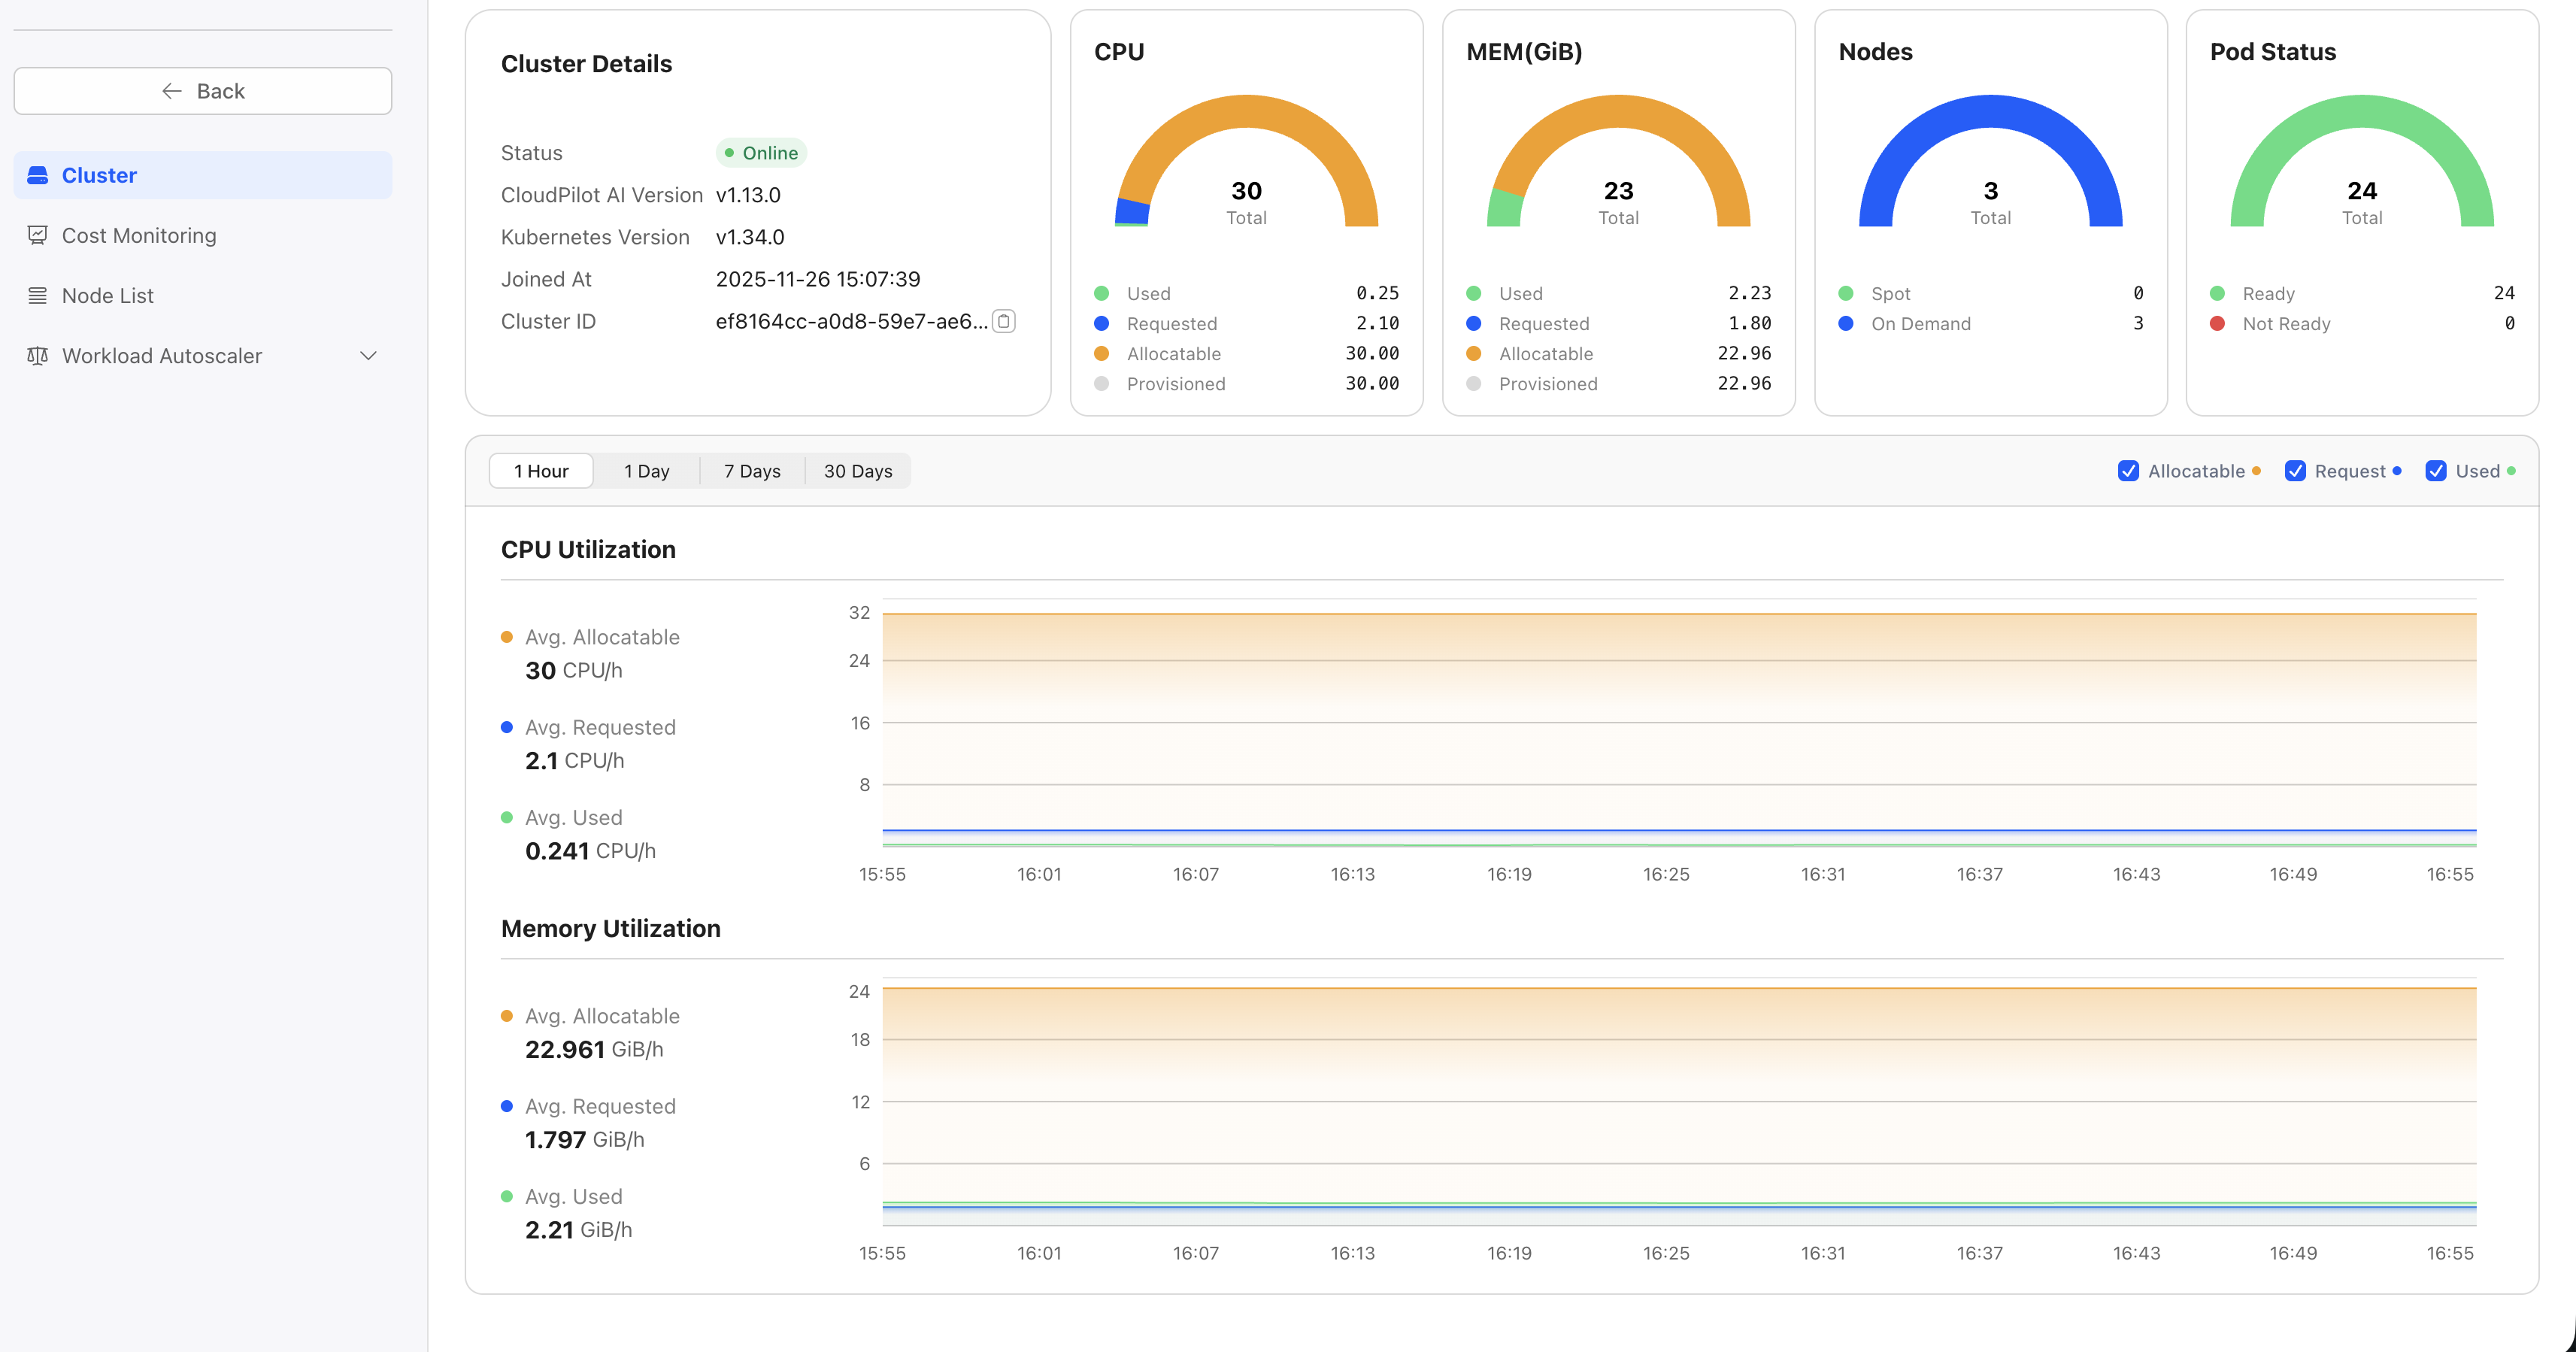
- Click the selected cluster, navigate to the Cluster tab, and view the cluster information.
Step 2: Customize Compute Cost
To enable accurate cost monitoring and optimization recommendations, you need to configure the compute cost for your cluster nodes. This helps CloudPilot AI calculate potential savings and provide accurate cost insights.
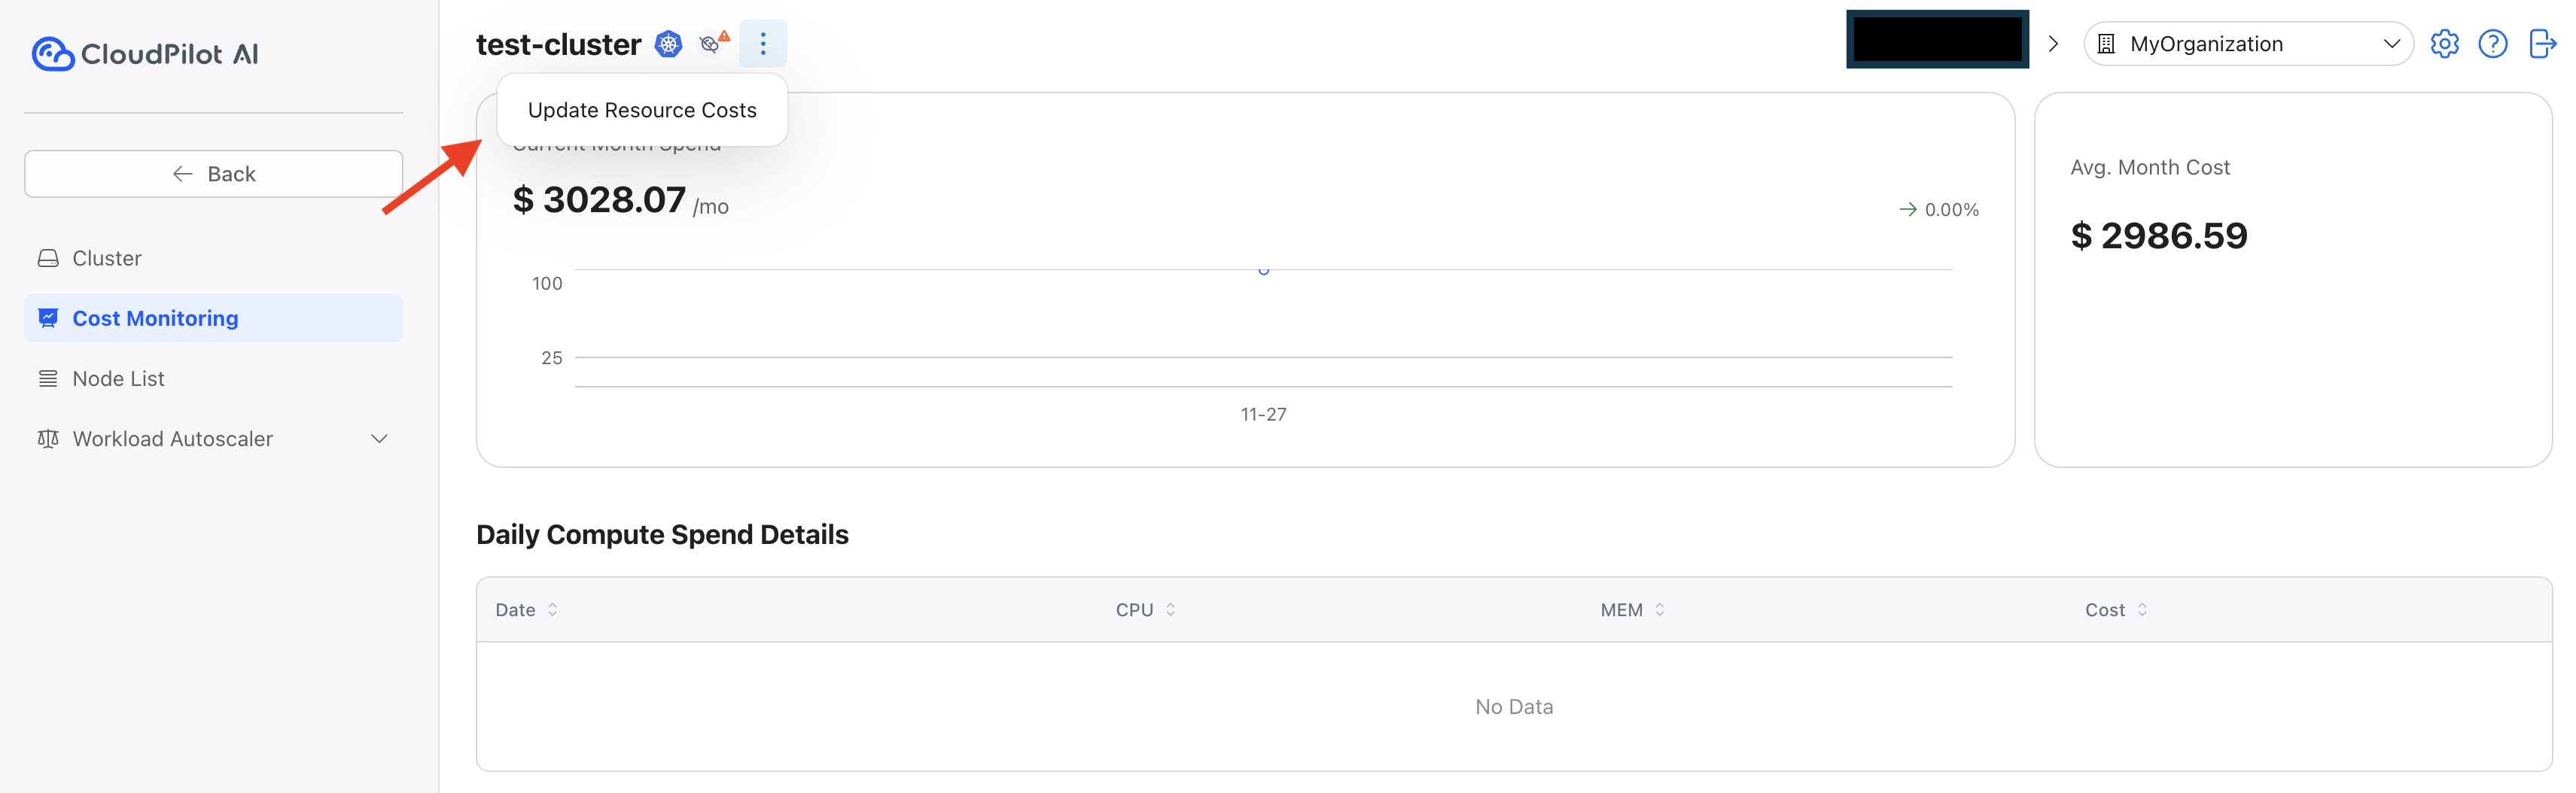
- Navigate to the Cost Monitoring tab in your cluster dashboard.
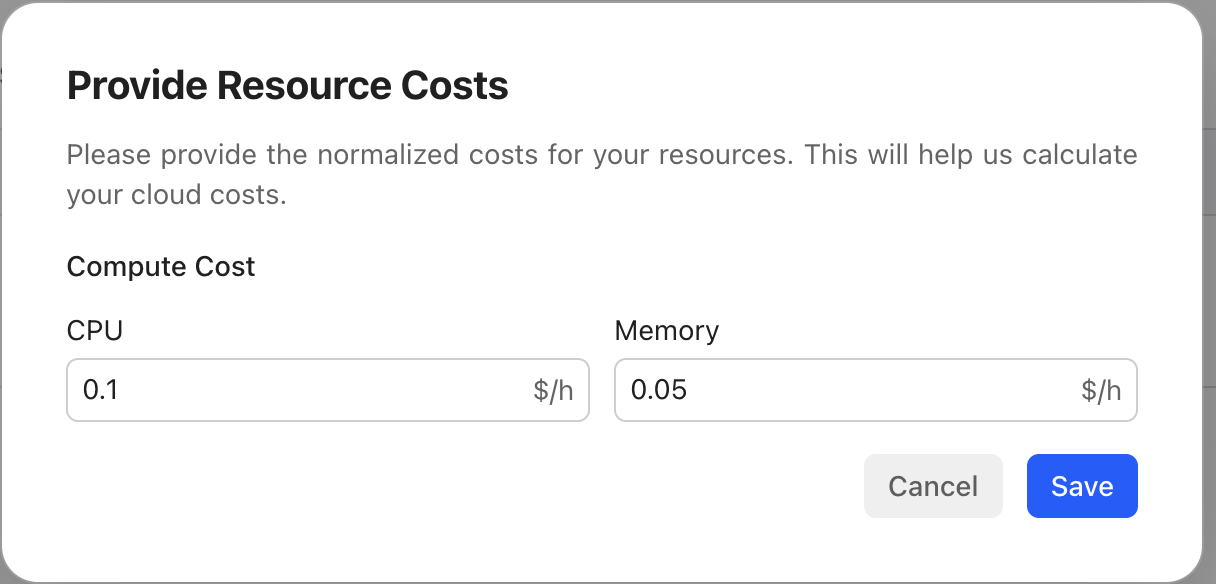
- Click Update Resource costs.
- Enter the hourly cost for CPU and Memory:
- CPU cost per hour: The cost per CPU core per hour
- Memory cost per hour: The cost per GiB of memory per hour
After configuring the compute costs, CloudPilot AI will be able to display real-time cost monitoring for your cluster.
Step 3: Install Workload Autoscaler
The Workload Autoscaler automatically adjusts pod resource requests and limits based on actual usage patterns.
For detailed installation instructions, including Prometheus requirements and configuration steps, see the Workload Autoscaler Installation guide.
Step 4: View Optimization Plan
After enabling Workload Autoscaler optimization, your workload resource requests will be significantly reduced. This allows you to binpack your pods more efficiently, enabling you to release certain nodes and reduce costs. The CloudPilot agent calculates which nodes can be drained without causing pods to be pending.
You can view this information on the Optimization Plan page. Nodes marked as “Removable” indicate that all pods on those nodes can be successfully rescheduled after eviction.
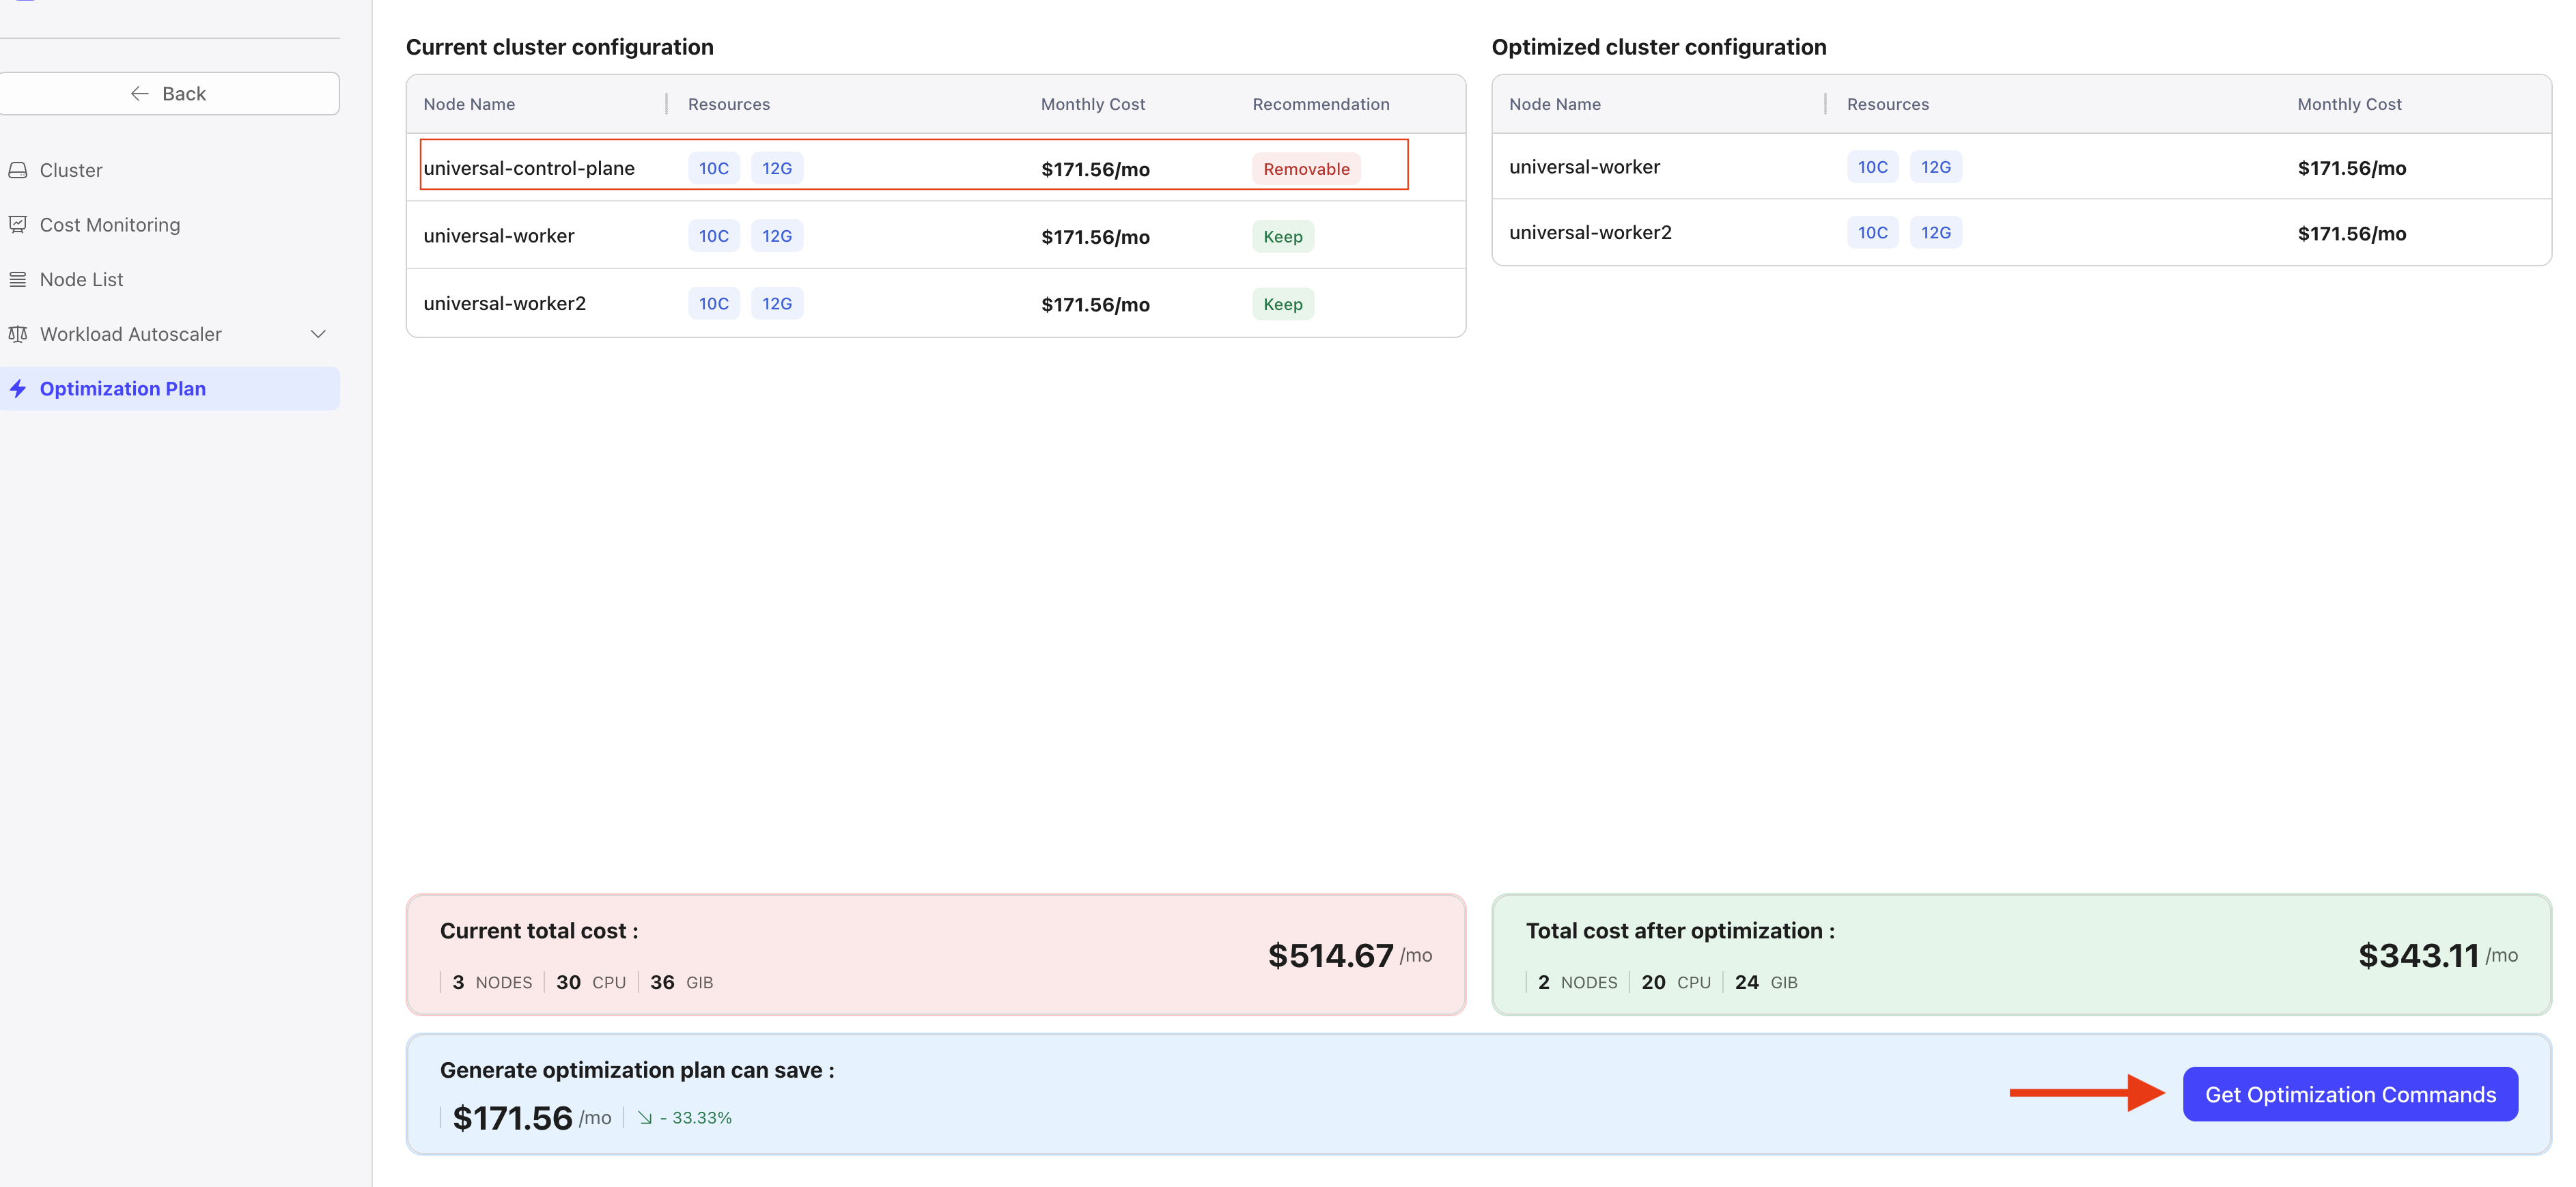
To apply the optimization:
- Click the Get Optimization Commands button to retrieve the commands needed to evict the pods.
- Execute the provided commands to evict the pods from the removable nodes.
- Remove the corresponding nodes from your Kubernetes cluster to reduce costs.
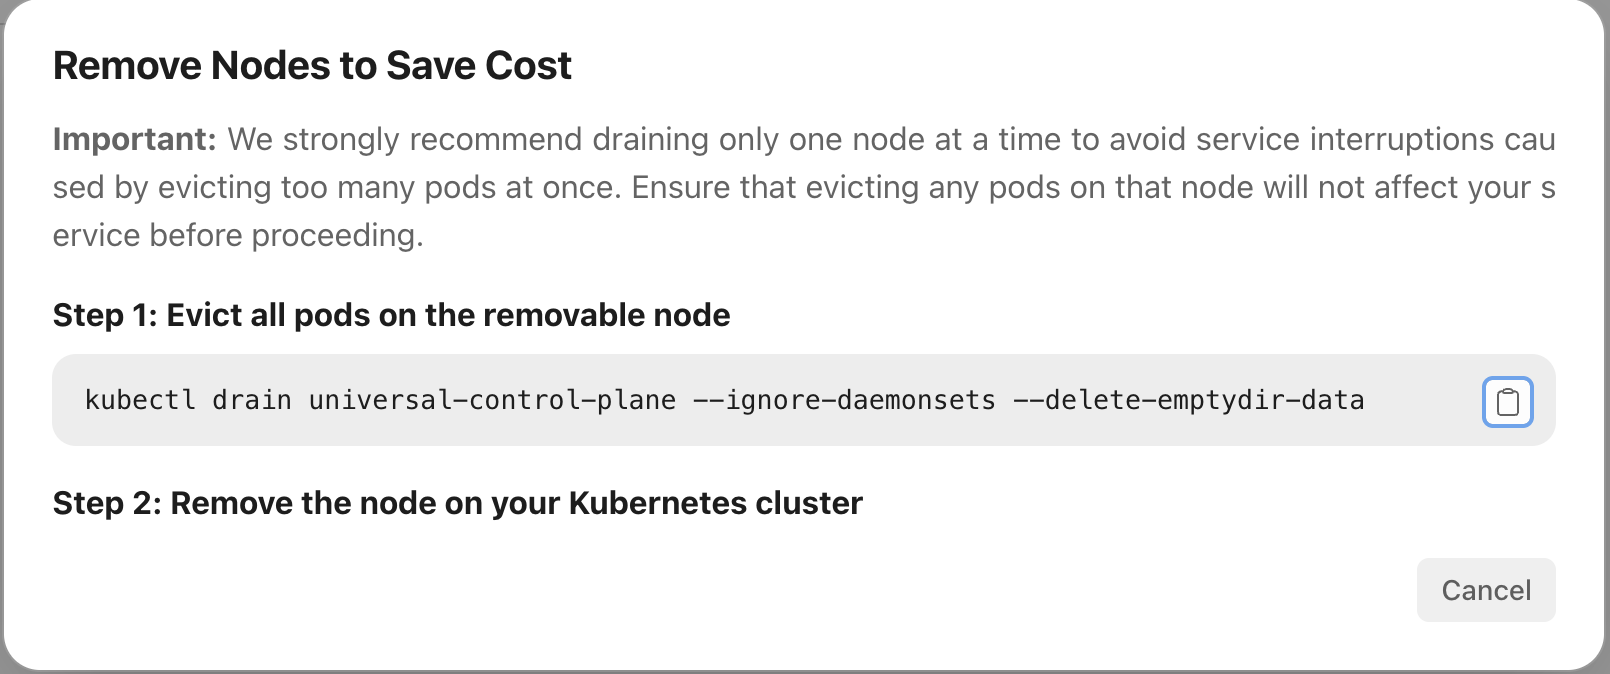
According to the simulation of CloudPilot Agent, you may have multiple nodes that can be released. We strongly recommend evaluating all the pods running on the nodes first, and then draining one node at a time to avoid service interruption caused by evicting a large number of pods.