Set Up Image Accelerator
To enable Image Accelerator, create or edit a NodePool and enable Image Accelerator on that NodePool. For EKS and GKE, you must also enable Image Accelerator on the referenced NodeClass. For AKS, you do not need to enable it on the NodeClass.
This workflow is the same across EKS, GKE, and AKS once the CloudPilot AI Phase 2 components are installed.
1. Enable Image Accelerator on the NodeClass (EKS and GKE only)
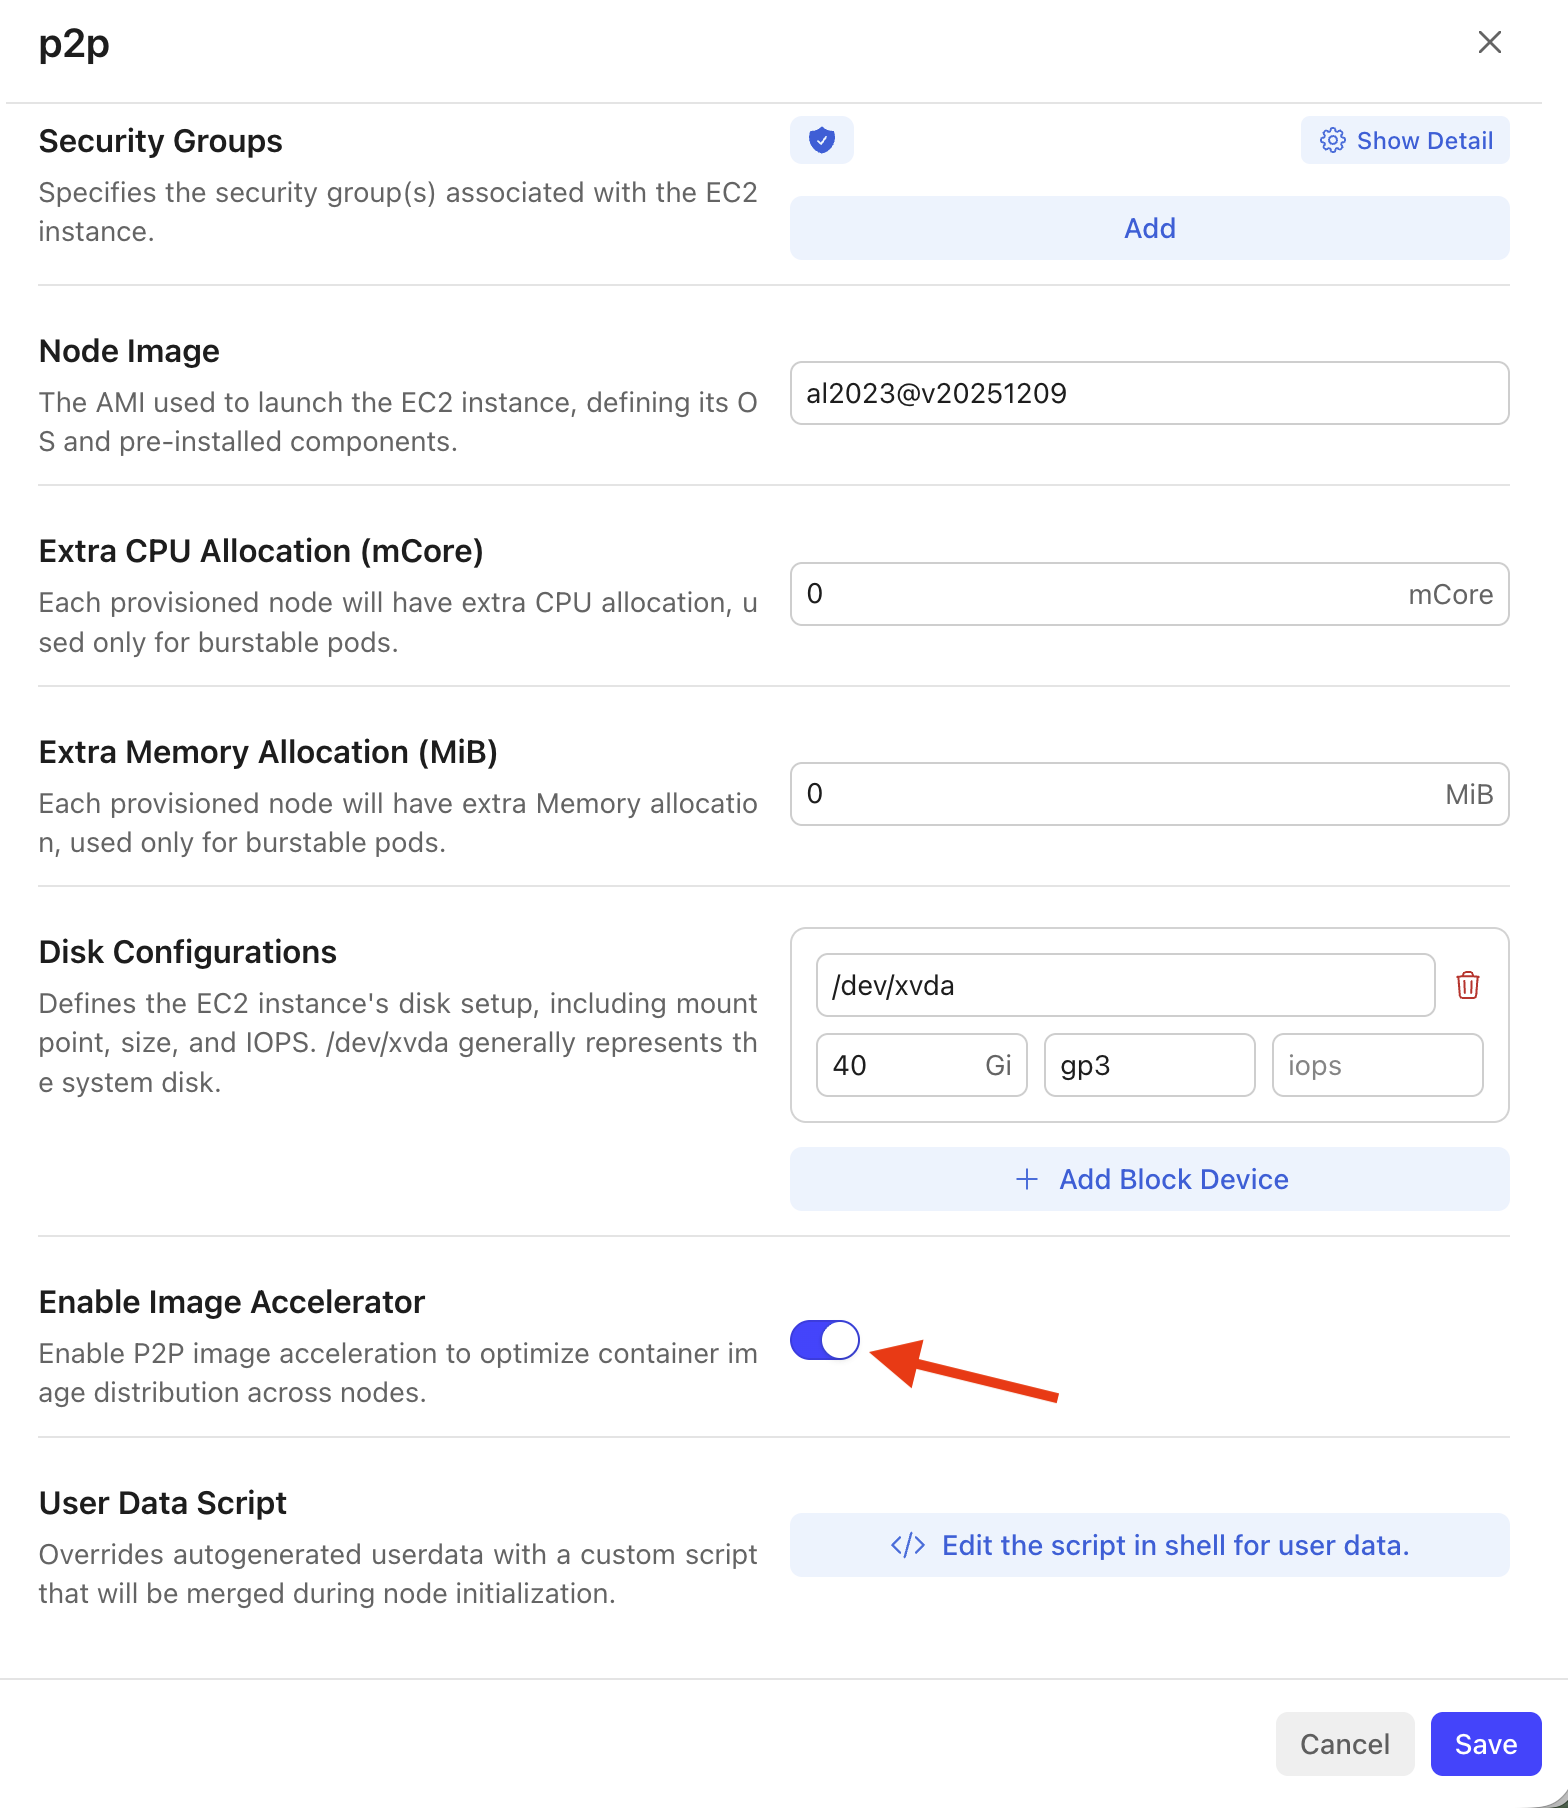
- Open the Node Autoscaler configuration for your cluster and go to the NodeClass you want to use (e.g. for P2P nodes).
- Find the Enable Image Accelerator option and turn the switch On.
- Save the NodeClass.
AKS note: Skip this step on Azure AKS. Azure only needs the NodePool image accelerator setting and does not require Image Accelerator to be enabled on the
AKSNodeClass.
2. Select the NodeClass in the NodePool
- Create a new NodePool or edit an existing one.
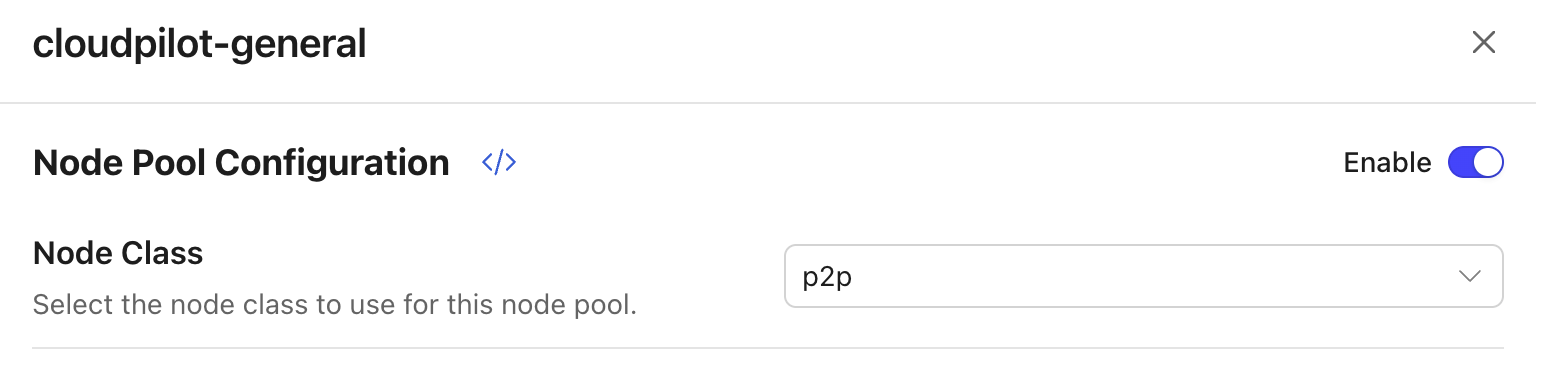
- In Node Pool Configuration, enable the section if needed, then in the Node Class dropdown select the NodeClass you want this NodePool to use.
- For EKS and GKE, select the NodeClass where you enabled Image Accelerator in Step 1. For AKS, select the
AKSNodeClassyou want to use; no separate NodeClass image accelerator switch is required.
3. Enable Image Accelerator on the NodePool
- In the same NodePool configuration, find Enable Image Accelerator.
- Turn the switch On and save the NodePool.
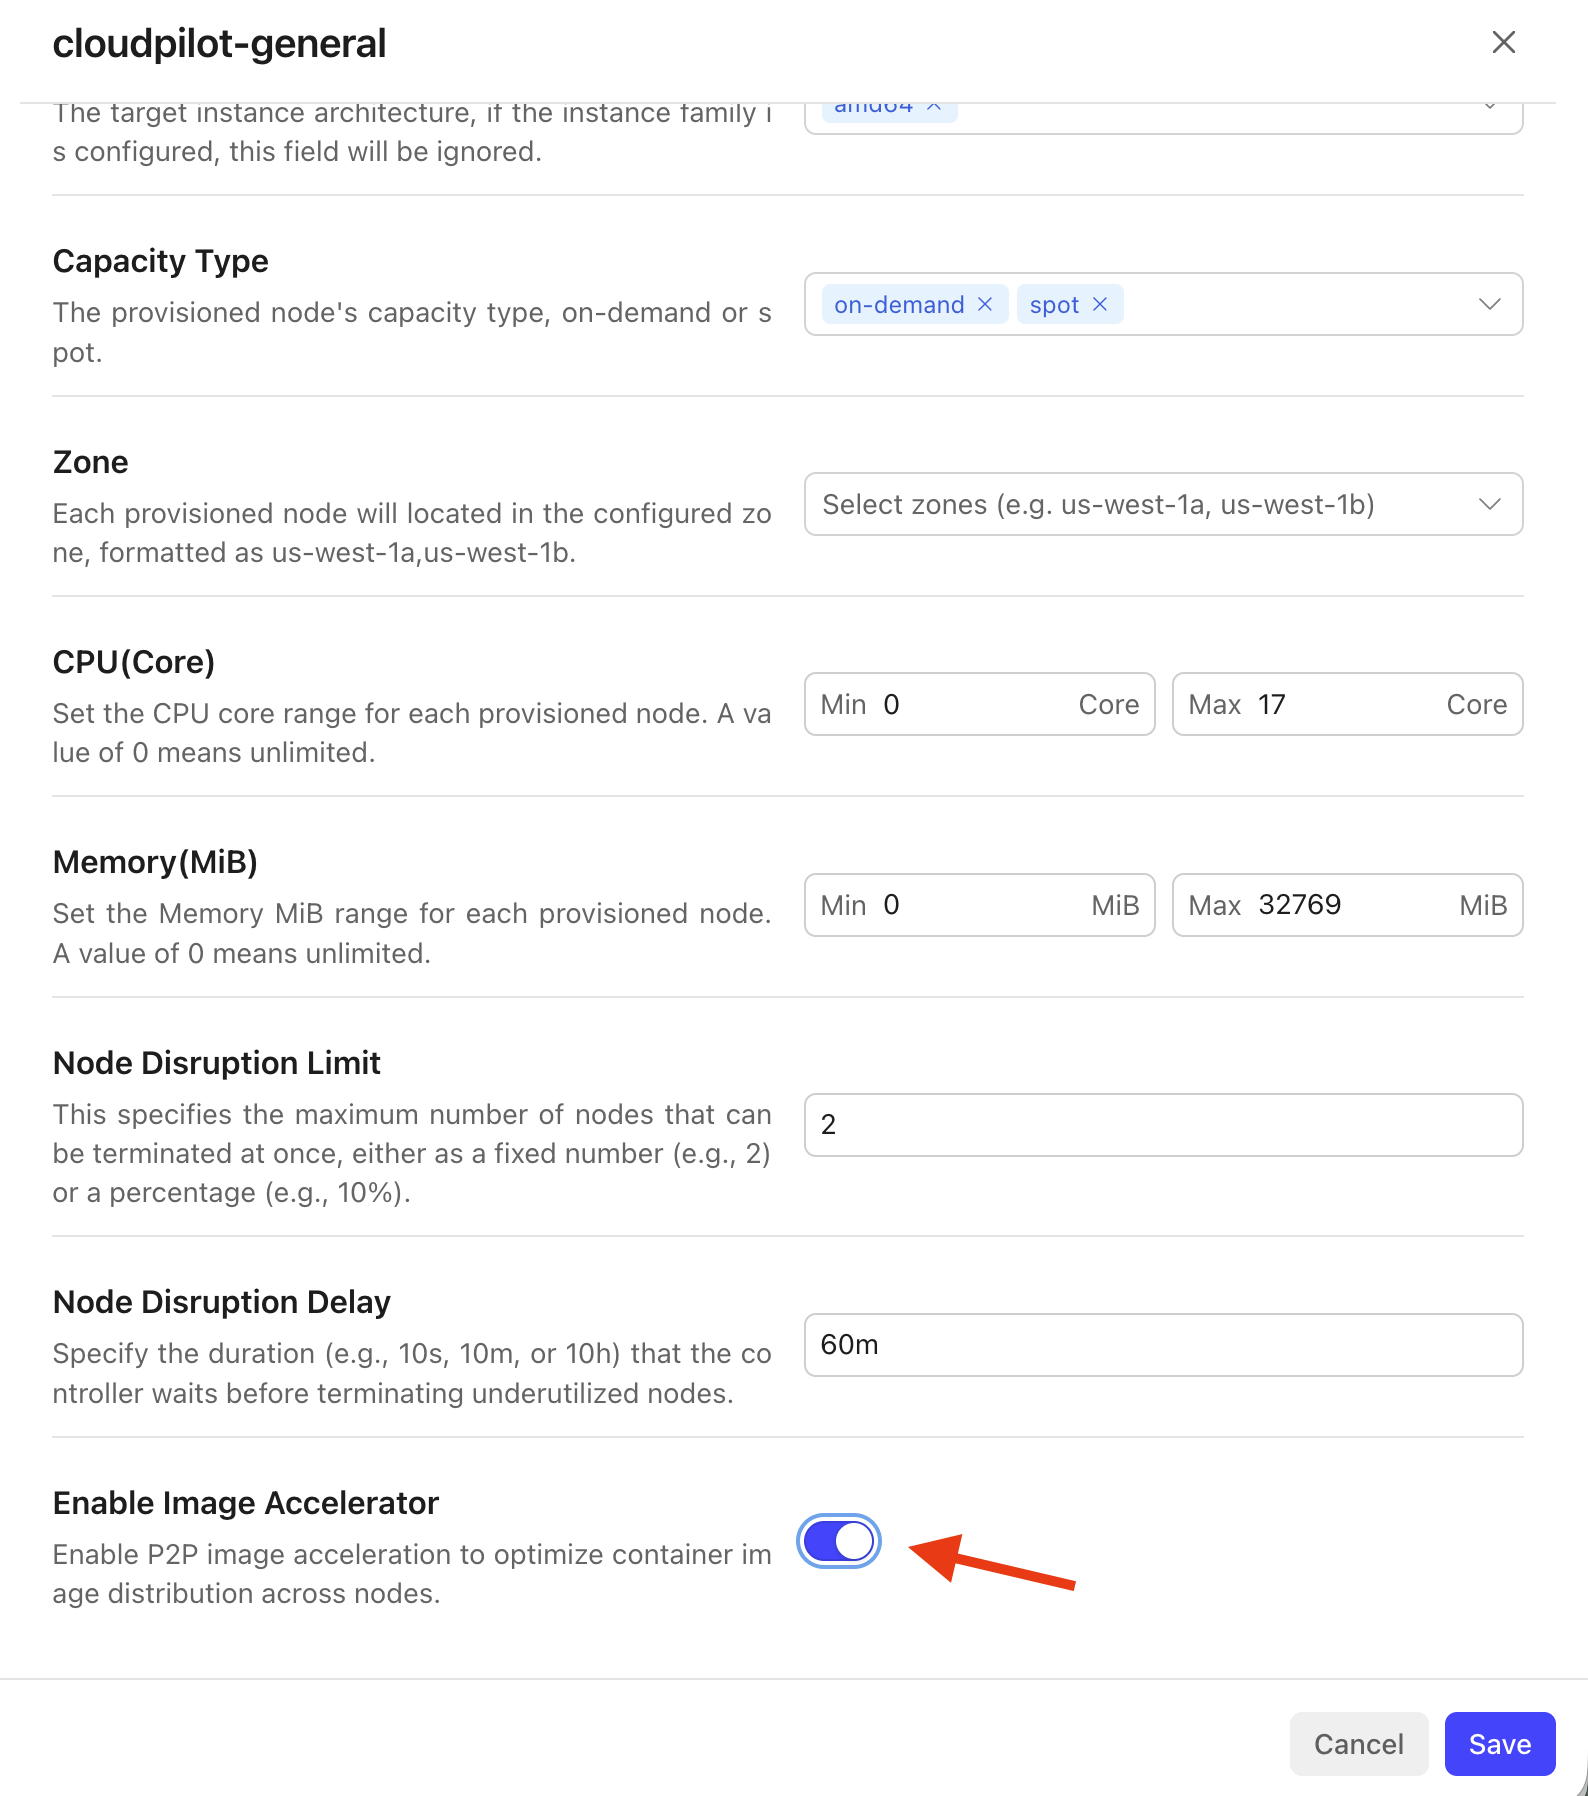
New nodes created by this NodePool will start with Image Accelerator enabled. Pods scheduled on those nodes will use P2P image distribution when pulling images.
4. View Acceleration Metrics
After nodes are running, open Image Accelerator in the left navigation to see:
- Overview: Total accelerated data and total mirror request hits.
- Node Details: Per-node metrics such as Served, Pulled, and Last Success Time.
Note: The Overview numbers are cumulative across the cluster’s history. Since nodes can be continuously created and deleted after enabling Node Autoscaler, metrics from deleted nodes are still included. It is normal for the total to be larger than the sum of currently visible nodes.

Use this page to confirm that acceleration is active and to inspect per-node behavior.